
Virtual Private Network (VPN) broadcasts a private network across the public network. This helps people to share, send and receive data over the internet across shared and public networks such that their computing devices are directly connected to a private network. So have a look at the complete guide discussed below to proceed.
How to Set Up A VPN In Windows 10/11
Before you install the VPN setup into your computer, log into your Windows 10 with all your administrative privileges. And after that, you need to follow the below simple steps to set up VPN on Windows 10/11.
1. To start setting up VPN in Windows 10, open Settings.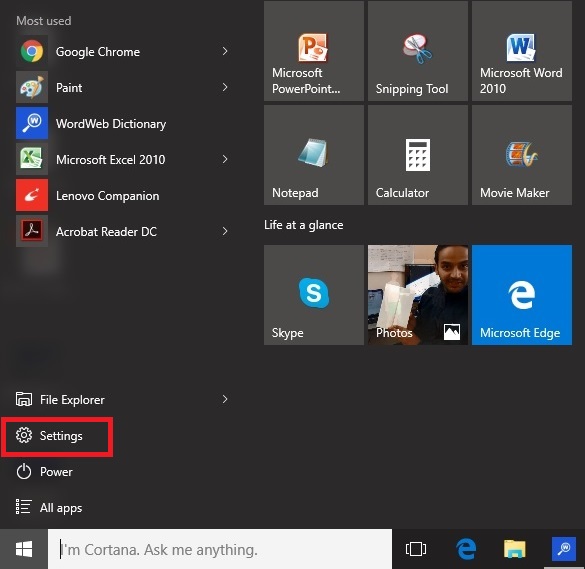
2. Select the option Network and Internet.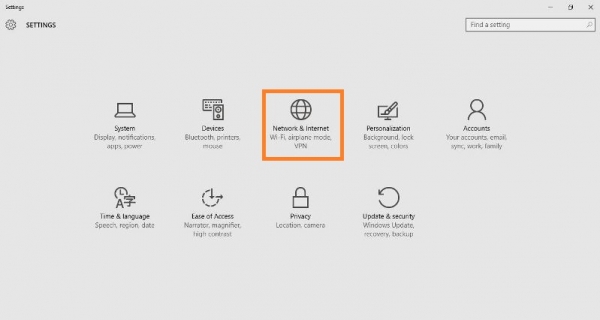
3. On the left pane, select VPN, and the VPN setup window will appear in front of you.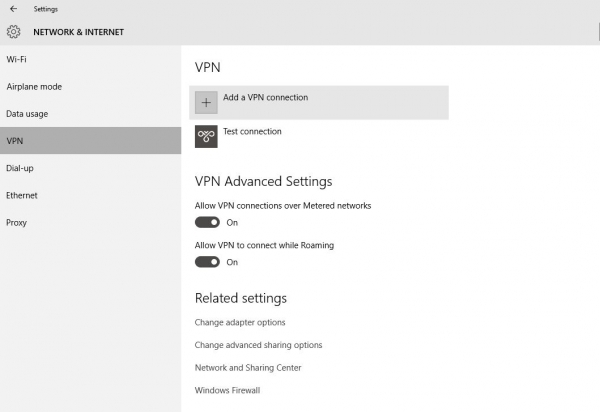
4. Click Add a VPN connection, and a new window will appear showing the setup of the VPN in Windows 10.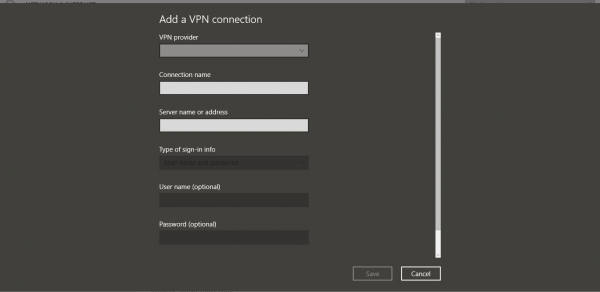
5. Now fill in the following details:
- Select Windows (by default) under the VPN provider
- Assign a connection name according to your choice.
- Enter the server name or address.
- From the VPN type, Select Point-to-Point Tunneling Protocol(PPTP).
- Enter username and password.
- Select Remember my sign-in info at the bottom so that in the future, you will be avoided login in again and again.
- Finally, save it.
6. Now, you will observe a newly added VPN connection present under the VPN Windows.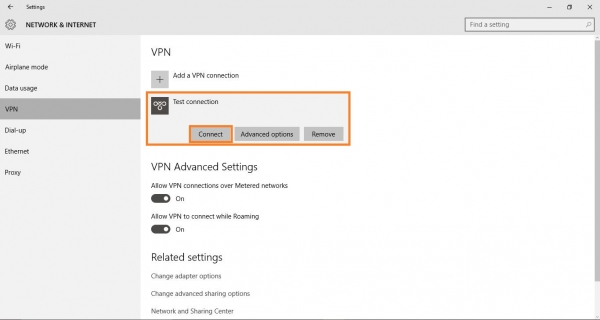
7. Click on that newly added connection and select Connect. This will connect you to your server.
8. If you want to edit the information of your newly added connection, click on Advanced Settings, present just below Connect.
9. Advanced Options will display all the connection properties of the newly added VPN. Click on the Edit button to re-edit the VPN information. Click Clear sign-in-info below the Edit option to clear your password/username.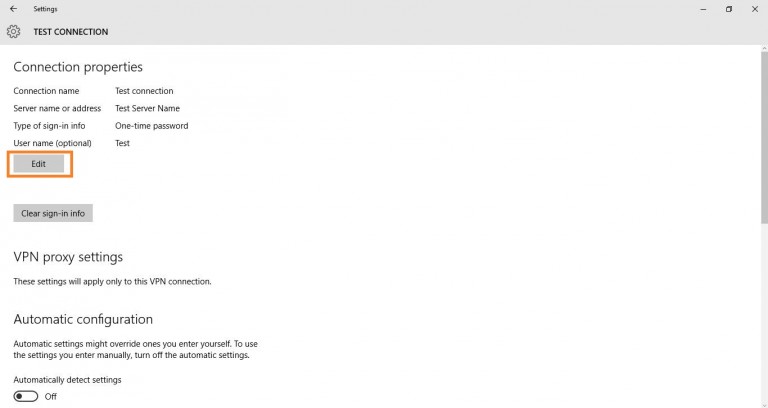
How to Disconnect and Remove a VPN on Windows 10?
The above section of the article explains how to set up and connect to a VPN in Windows 10. However, what if you no longer want to connect to a VPN on Windows 10?
In that case, it’s best to remove the VPN server from the list. On Windows 10, you can disconnect and permanently remove a VPN. Here’s what you need to do.
- Right-click on the Start button and select Settings.
- On the Windows Settings, click on Network & Internet.
- On the left side, click on the VPN tab.
- Now, on the right side, click on the VPN connection and select Disconnect.
- If you wish to remove the VPN, click on the Remove button.
- On the confirmation prompt, click on Remove again.
That’s it! This is how you can disconnect and remove a VPN on Windows 10 computer.
Best VPN for Windows 10/11
If you don’t want to go with the manual setup, other options are also available. You can use VPN apps for Windows 10 to connect with a VPN server of different locations.
Premium VPN software for Windows 10 also has added benefits, like the Kill Switch that immediately terminates the VPN connection in the event of IP leaks. VPN apps for PC provide you with thousands of services to connect with.
This is all about how to set up a VPN on Windows 10/11. The guide lets you easily set up the VPN on your Windows 10 PC. So try this out today and have fun. I hope you like the guide; keep on sharing with others too. Leave a comment below if you have any related queries about this.

")
")