
Many of you have rooted your Android device as it gives you comprehensive adminship of your device. And the most exciting thing you can do with rooted Android is to install Custom ROM.
The unfortunate thing that can happen while flashing custom ROM is device brick. So, here I will discuss how to install custom ROM on your Android safely. Let’s get started.
Steps To Safely Install Custom ROM On Rooted Android
Even though the steps we share will help you avoid the risk of bricking, it’s still recommended to have an expert with you who has prior experience flashing custom ROM on Android.
1. USB Debugging
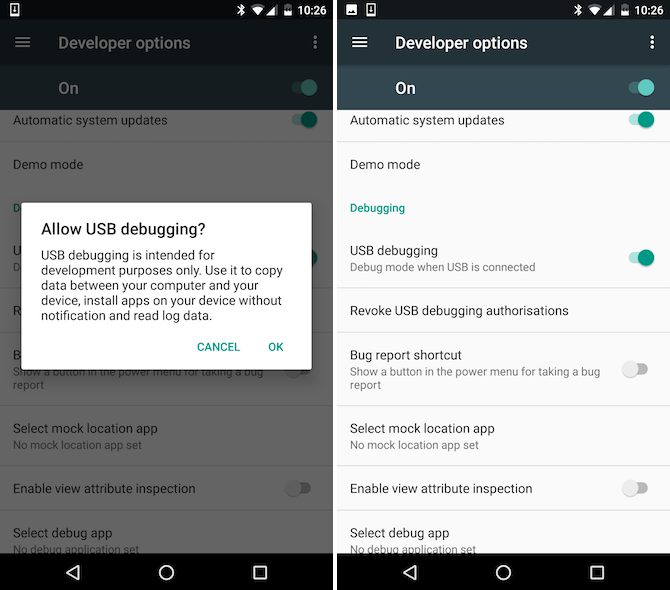
The first thing to do if you have planned to install custom ROM is to turn on the USB debugging mode. To enable the USB debugging mode, you need to head to Settings > Developer Options and turn on the USB debugging mode.
2. Disable The Security
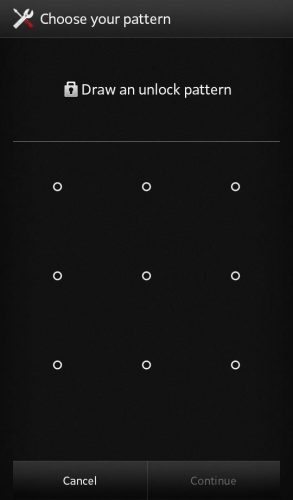
It will always be better to disable all your security settings before you flash a custom ROM. If you use a fingerprint scanner/ Pin and Pattern lock, then disable it.
3. Charge Your Phone
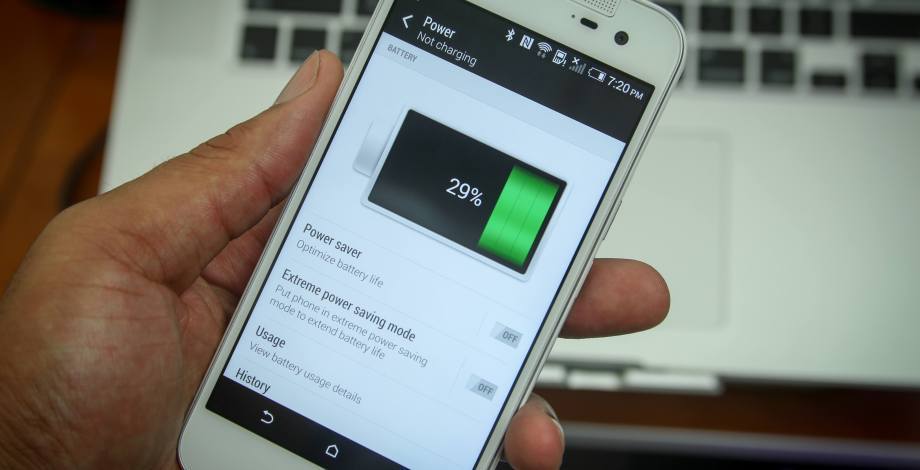
If you don’t have enough charge on your phone, you need to charge it fully. You can even plug it in while you are flashing custom ROM. Nobody will ever want their phone to run out of power halfway through flashing a ROM.
4. Install Custom Recovery On Your Rooted Device
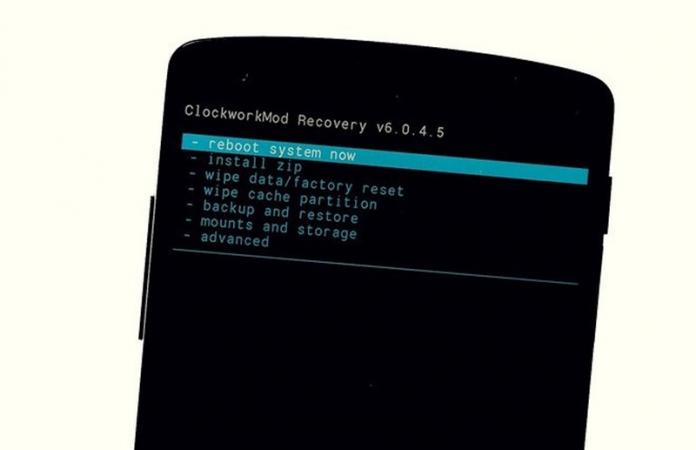
Installing Custom Recovery is the first thing to do if you want to back up or install custom ROM on your rooted device. You need to go through our post How To Install Custom Recovery On Android to know how to install the custom recovery on your device.
5. Take a Complete Backup Of Your Android Data
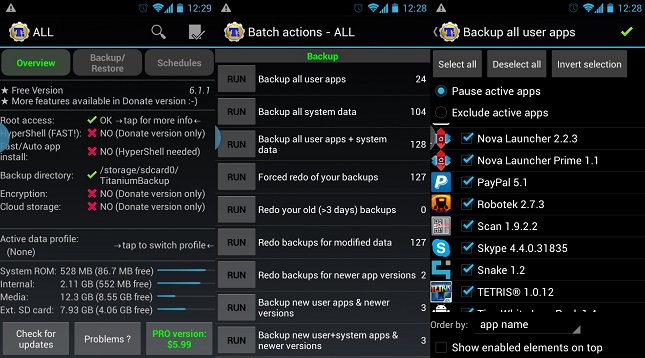
First of all, you need to back up all your apps on your Android. We suggest Titanium Backup, which will work on rooted Android and give you a complete backup of all your data. Save the backup file on your SD Card.
Apps To Take Backup Of Your Android Data
Helium – App Sync and Backup
Helium lets you back up your apps and data to your SD card or cloud storage. With Helium, you can sync app data from your other Android devices, even if they are not on the same network. Set up backup schedules with Helium and never lose data again.
Backup & Restore
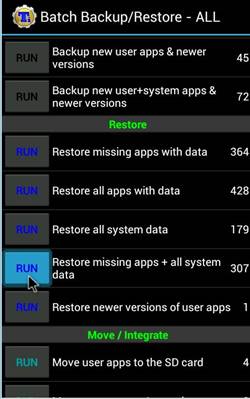
Backup & Restore can batch Backup & Restore apk of apps that are not frequently used to save phone space. This is a full-fledged backup app for Android that works with both rooted and non-rooted Android devices.
6. Take a Backup Of Your Current Rom
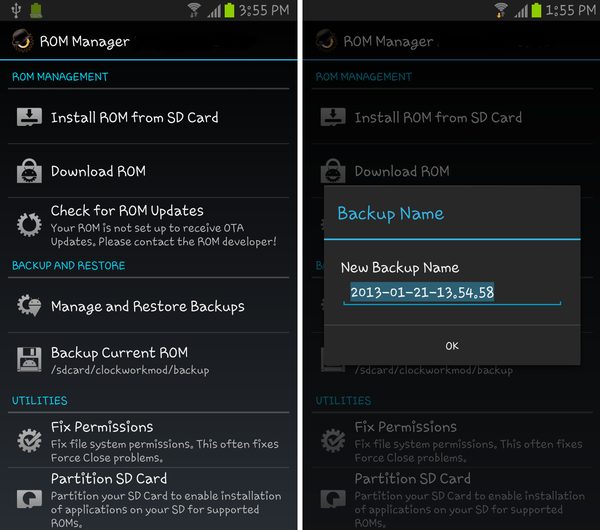
The major thing you have to do is backup your current ROM, which can be best done with the help of either Clockworkmod or Rom Manager; these apps will automatically backup your current ROM and then save the backup file on your SD Card.
7. Installing Custom Rom Using Rom Manager App Or Clockworkmod
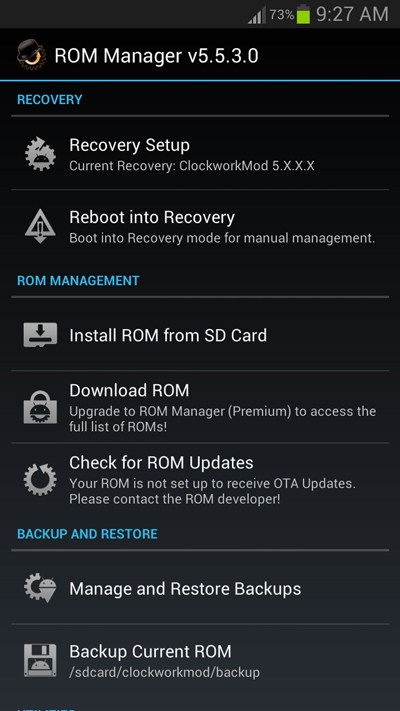
Now after doing all the above steps, proceed with installing the file of your ROM. This can be done using the Clockworkmod or the ROM Manager App, which is quite safe.
8. Restore Previous Rom If Your Device Got Bricked
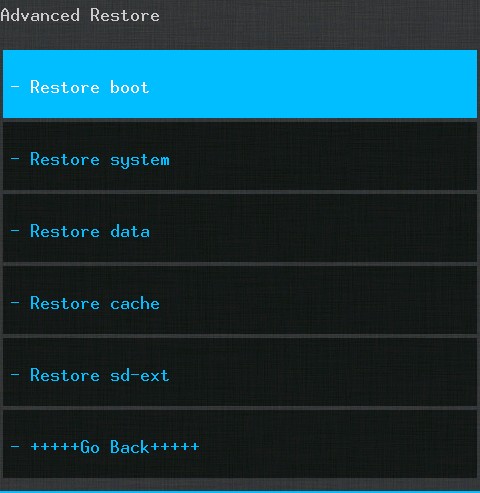
If the worst case, if your device gets bricked, do not panic as you are ready to best handle this situation. Now you can return to your previous ROM by opening your custom recovery Clockworkmod and Restoring the backup file from your SD Card.
9. Restoring Apps And Data Using Titanium Backup
While installing custom ROM on your device, you will have to do a factory reset. All your apps and data will be lost. Hence, you need to use the Titanium Backup you made in the first step.
So, these are some simple steps that will let you safely install Custom ROM on a Rooted Android smartphone. If you need more help installing Custom ROM on Android, let us know in the comments below.
")

")