
On the Windows operating system, we got the freedom to create different hard disk partitions. You can store different types of files in different partitions. Usually, we partition our hard drives during the fresh installation of Windows. However, what if you want to create a new partition on the existing hard drive?
Well, you can actually create new partitions without formatting your Windows. In this article, we are going to share a few different methods to partition a hard disk drive without formatting your Windows operating system.
How To Partition A Hard Disk In Windows Without Formatting
We will be using a few third-party software to partition a hard disk drive without formatting. So, let’s check out how to partition a hard disk drive without formatting Windows.
1. Using Disk Management Utility
This is a built-in tool of the Windows operating system which allows users to create or manage the existing partitions. However, the tool is a little bit complicated to use. So, here’s how you can use Disk Management Utility to create a new partition.
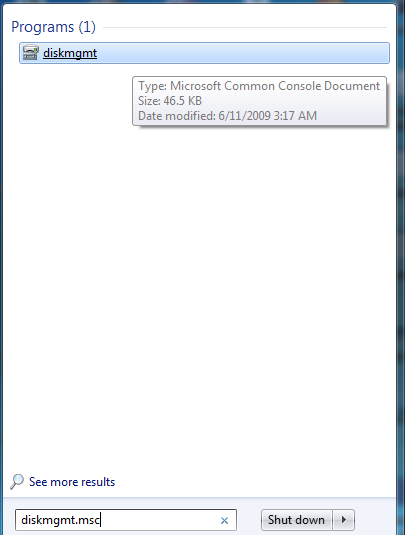
Step 1. Click Start and type “disk mgmt.msg” (without quotes) and press enter. Now a disk management window will appear.
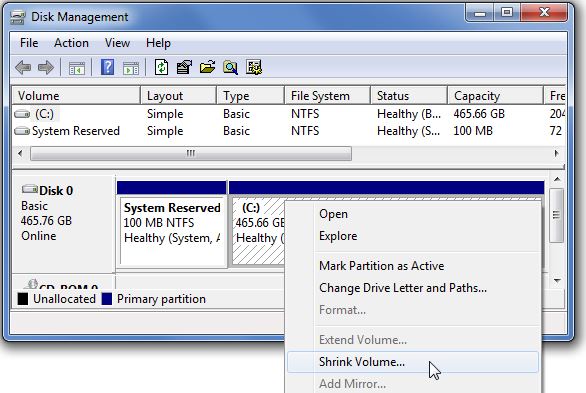
Step 2. Here you can see all your drives that are being currently available. Choose one of the drives which you want to shrink or extend. For shrinking a drive and creating a new one there must be some free space on that drive. Now right-click on the drive letter which you want to shrink or take out free space. Now select shrink volume, & a little process will go on.
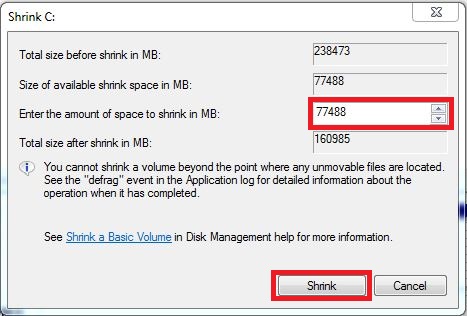
Step 3. Here you will see the current size of the drive, free space, and size which you want to shrink. Now enter the amount of space which you want to free, note that size should not exceed the free space. Now click the ‘shrink’ button.
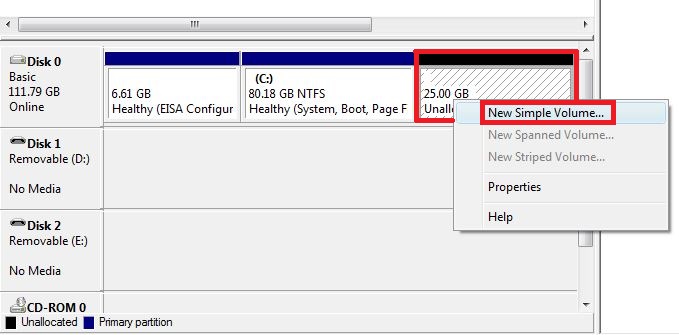
Step 4. In the disk management window you will see an unallocated space at the right bottom corner. Right-click on it and select New Simple Volume.
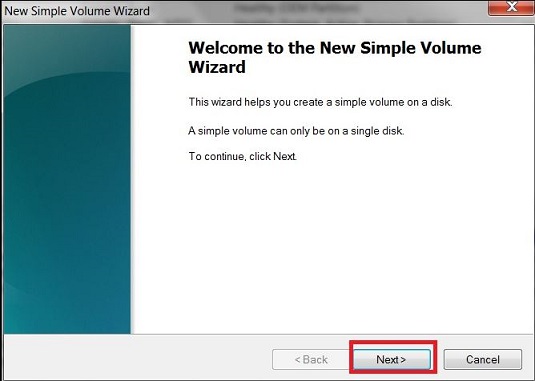
Step 5. Now you will be taken to “New Simple Volume Wizard” here you need to create a partition. Simply click “Next” to continue.
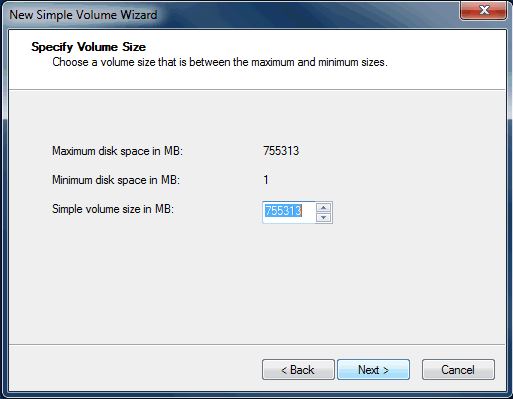
Step 6. Now on the very next page, you need to specify the volume size. You need to add the volume size here. Simply enter the volume and click on next.
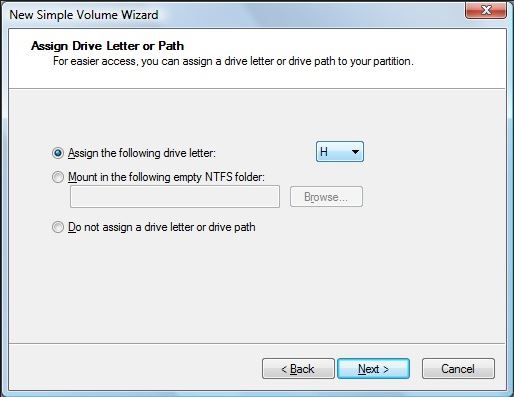
Step 7. Now you need to assign the drive letter. You need to drop down and select a letter of your choice.
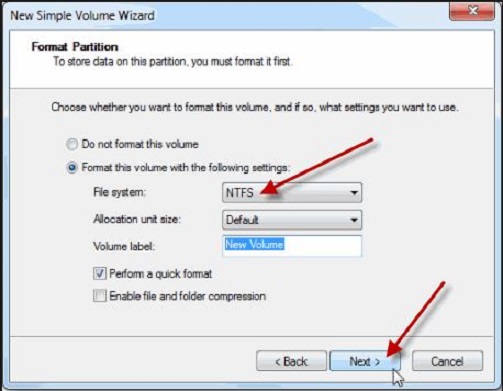
Step 8. Now you will be taken to the “Format Partition” page. Simply select the File system to “NTFS” and then Enter the name for your new drive and hit the “Next” button.
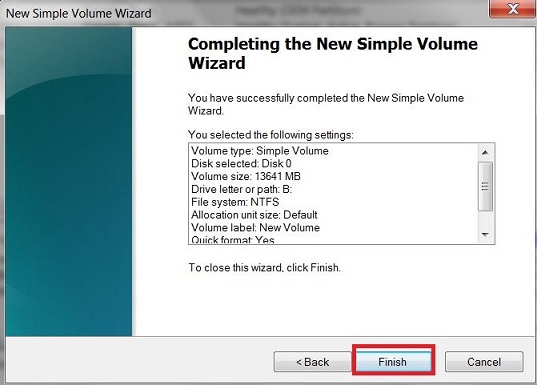
Step 9. Now it will format and you will see the summary window of your newly created drive. Simply click on “Finish” .
In the same way, you can enlarge the size of any drive when your drive gets overloaded by file, In that case, you can easily make some space unallocated by shrinking it from one drive and then using that space to extend another drive. In this way, you can easily Partition A Hard Drive without formatting them.
2. Using AOMEI Partition Assistant Professional
AOMEI Partition Assistant is a disk management software that can be used to shrink existing and create new partitions. The tool has lots of features, but we will be focusing on creating new partitions only.
Step 1. First of all, you need to download AOMEI Partition Assistant on your windows computer. Download and install.
Step 2. Run the app and you will see the list of all the hard disk partition there.
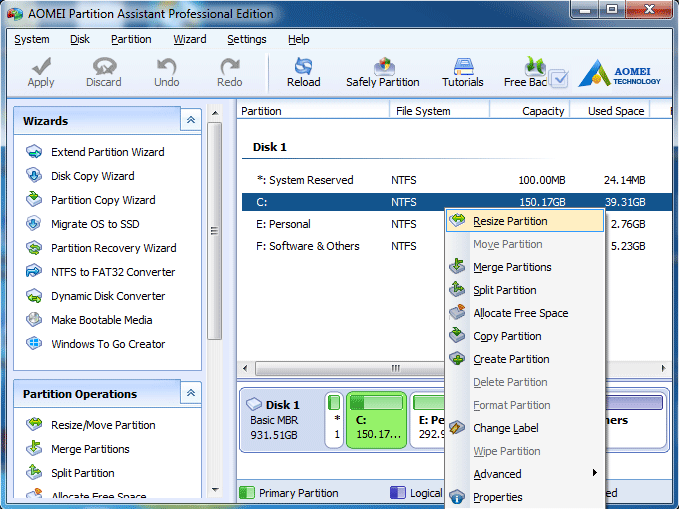
Step 3. Now in the next step, you need to choose the driver that you want to repartition. Simply right-click on the drive and then select the option “Resize Partition” from the right-click context menu.
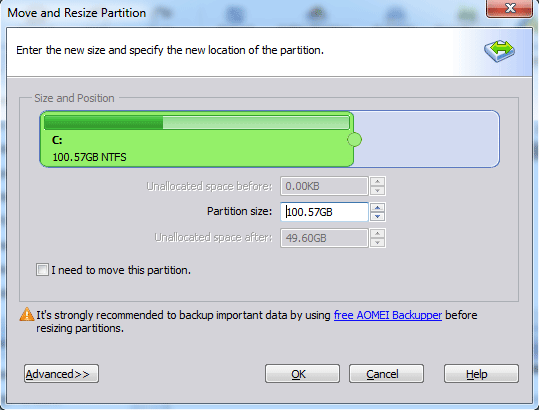
Step 4. Here you need to use the drag the slider to resize the volume of the partition. Simply, you can free up some space from the partition to get some unallocated space.
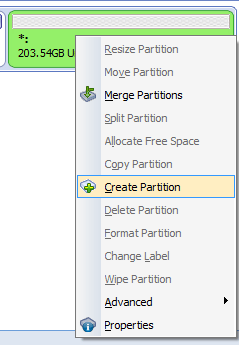
Step 5. Now right-click on the unallocated space and then select “create partition” option to create another partition to the hard drive and then click on ‘Apply’ to make the changes.
That’s it! You are done, this is how you can partition a hard disk without formatting.
3. Using EaseUS Partition Master
EaseUS Partition Master is one of the leading disk partition management software available for the Windows operating system. The great thing about EaseUS Partition Master is that it allows users to easily create disk partitions and manage the data storage space. Here’s how you can use EaseUS Partition Master to manage your disk partitions on Windows.
Step 1. First of all, download & install EaseUS Partition Master on your Windows 10 computer from this link.
Step 2. Once done, launch the software and you will see a screen like below.
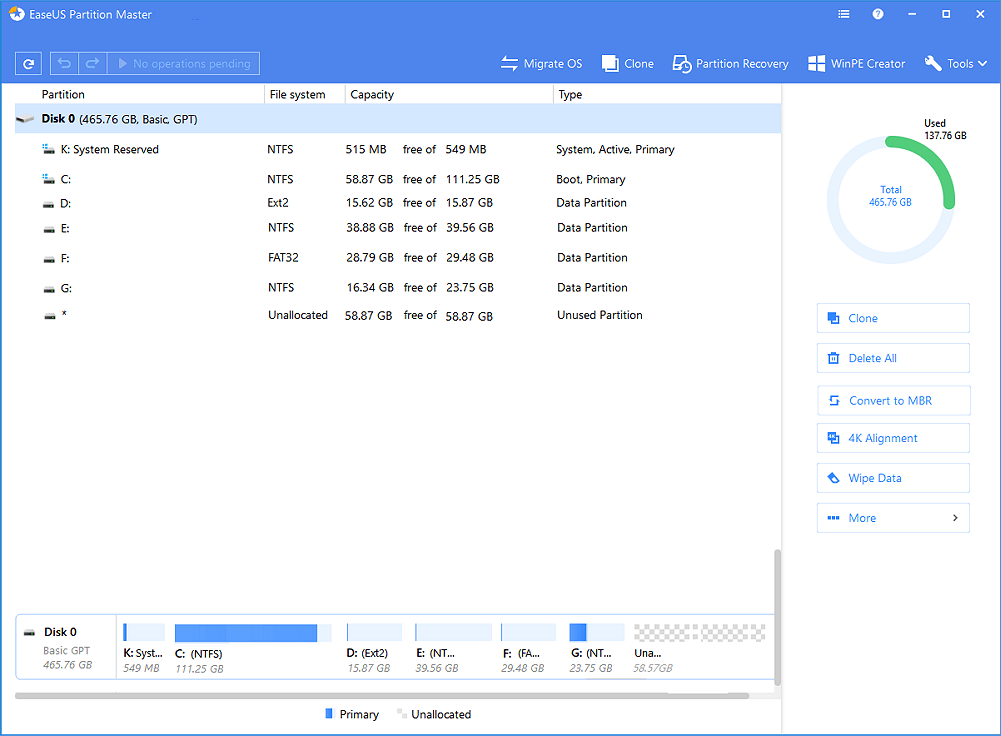
Step 3. To create a new partition, you need to resize existing partitions. So, right-click on the partition which you want to shrink and then select the option ‘Resize/Move’
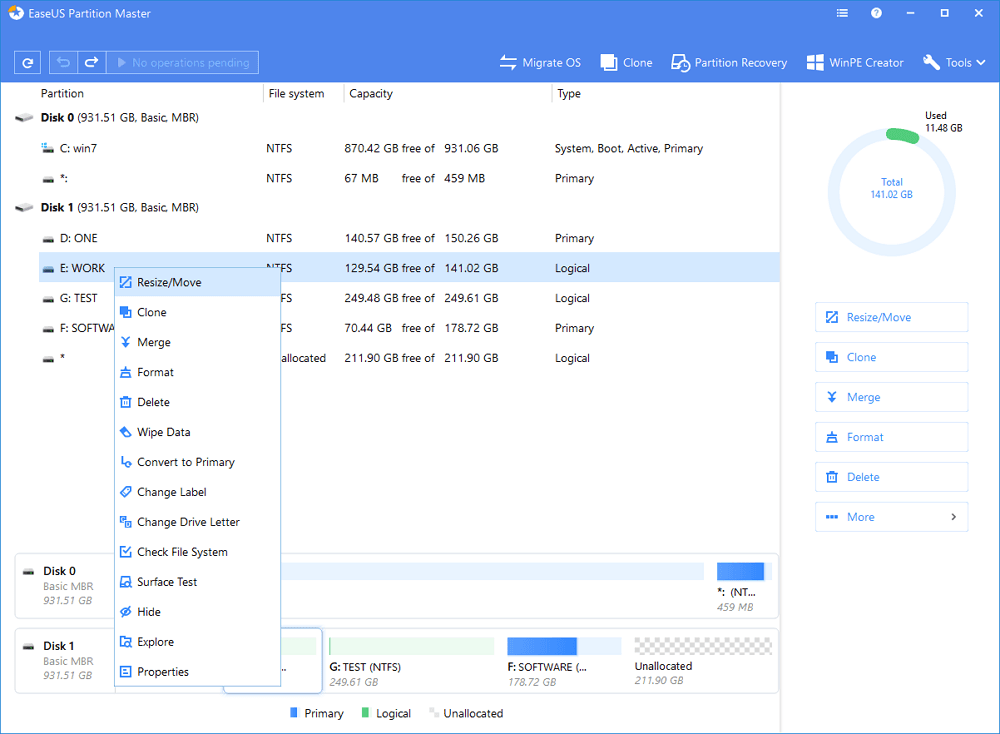
Step 4. Now adjust the size as per your requirement. Now you need to drag the target partition into the unallocated space.
Step 5. Once done, right-click on the ‘Unallocated Space’ and then select ‘Create’
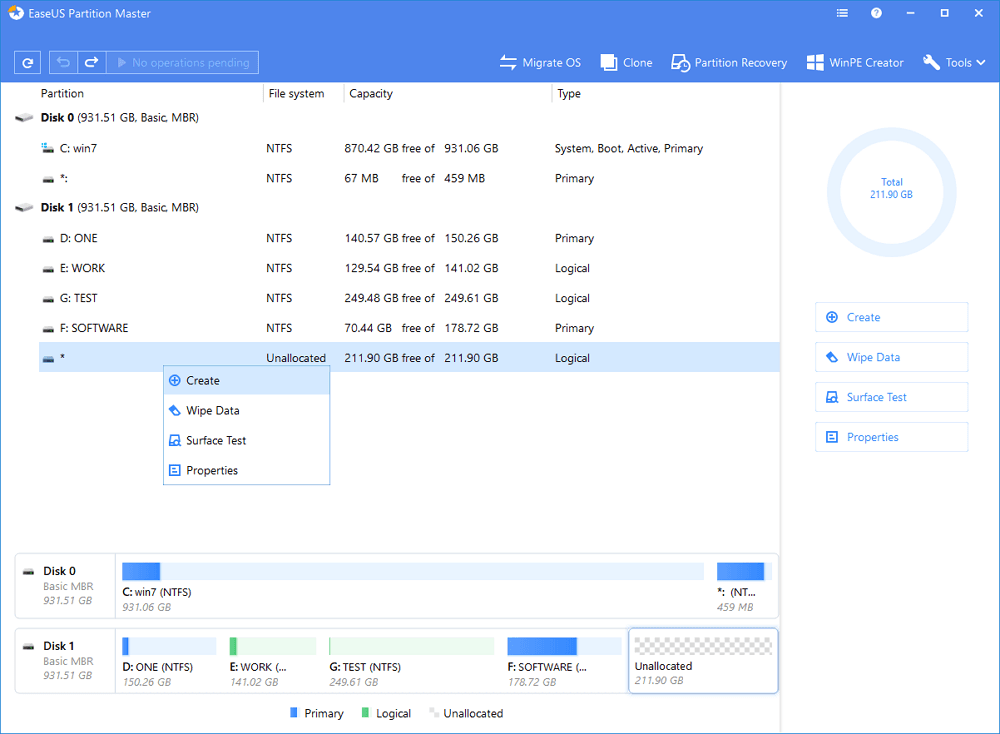
Step 6. Now you need to set the partition size, label, drive letter, file system, etc. Once done, click on ‘Ok’ button to create the partition.
That’s it, you are done! This is how you can use EaseUS Partition Master to partition a hard disk without formatting.
Video:
So, this is all about how to partition a hard disk in Windows without formatting. I hope this article helped you! Share it with your friends also. If you have any doubts related to this, let us know in the comment box below.


")