
Although Windows 10 is right now the most popular desktop operating system, it’s not without its flaws. Stability is the major issue with Windows 10. Every now and then Windows users face troubles related to drivers, crashes, bugs, etc.
Sometimes, Windows 10 fails to boot and just shows a black screen. At that time, we usually have no other option left apart from repairing or reinstalling the operating system. To deal with such things, Microsoft allows you to create a recovery drive.
A recovery drive stores a copy of the Windows 10 environment on another source, such as a DVD or USB drive. Windows recovery disk lets you restore your system to the original state. Also, it includes several troubleshooting options, which can be lifesavers if your system fails to boot.
Create A Windows 10 Recovery Drive/Disk
So, in this article, we are going to share a working method to create a Windows 10 recovery drive. Let’s check out.
[alert-announce]Note: A recovery drive might bring Windows 10 back to a bootable state, but all your personal files and applications will be lost.[/alert-announce]
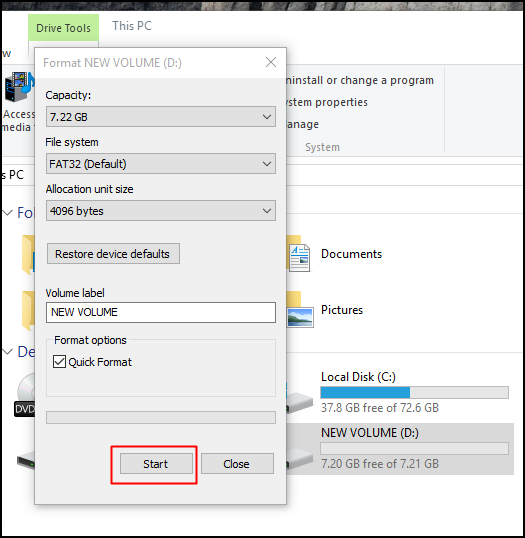
Step 1. First of all, you need to have an empty disk or a USB drive that you want to convert into a recovery drive, insert that drive in your PC. Format the drive.
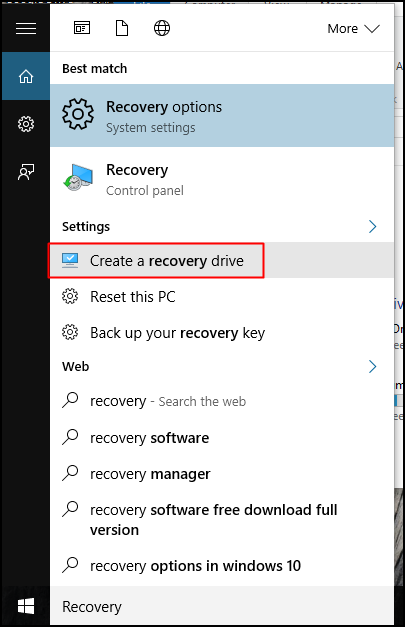
Step 2. Now press the Windows button of your computer and then type Recovery and then choose the option ‘Create a Recovery Drive’.
Step 3. Now just select yes to the admin access popup which appears there.
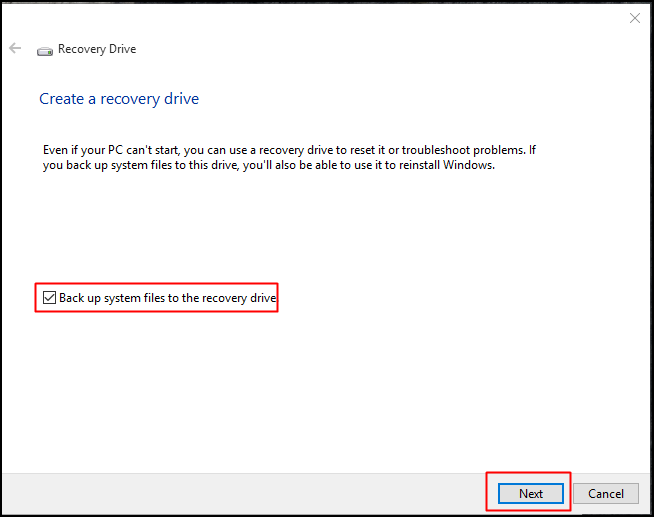
Step 4. Now check the option ‘Back up system files to the recovery drive’ and click on ‘Next’.
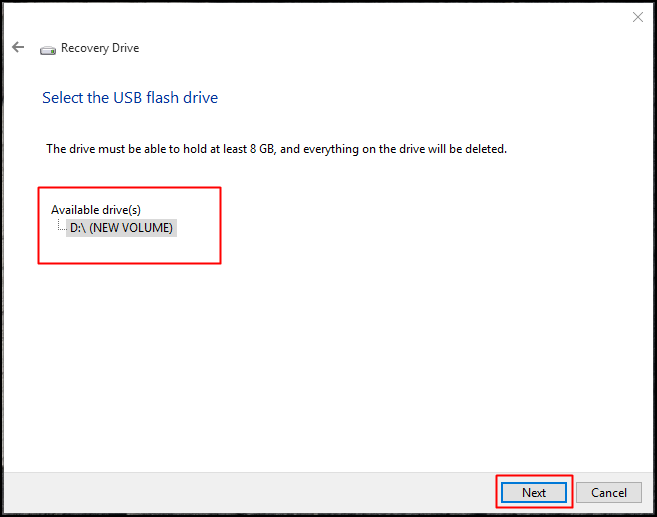
Step 5. Now on the next step, select the USB flash drive and click on ‘Next’.
Step 6. Now the recovery disk process will start and it will take some time.
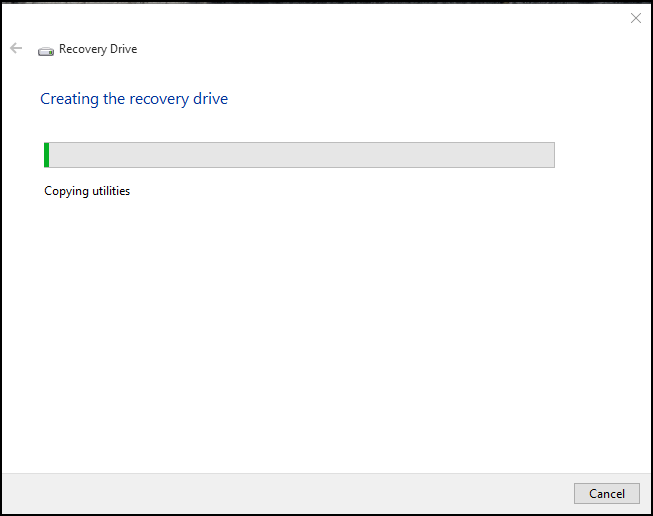
That’s it! you are done. Now the recovery drive of your windows is ready. Now, whenever your OS gets corrupted, you can use this recovery drive to boot into the operating system.
Using Todo Backup
Todo Backup from EaseUS is one of the best and free backup and recovery tools available for Windows computers. The best thing about Todo Backup is that it’s completely free and you can use it to create a Windows 10 Recovery Drive/Disk. Here’s how you can use EaseUS Todo Backup.
Step 1. First of all, download and install Todo Backup on your computer. You can get the download link from here.
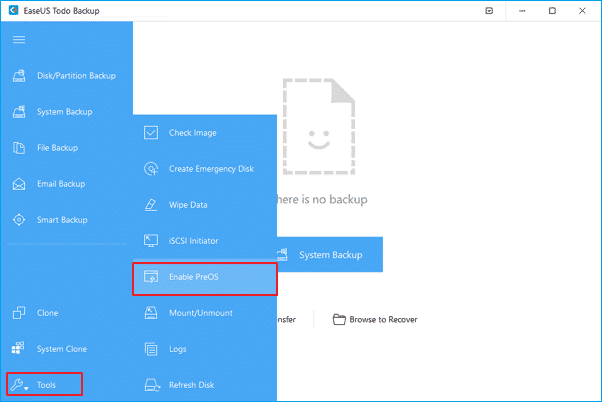
Step 2. Now, launch the tool and then head to the Tools > Enable PreOS
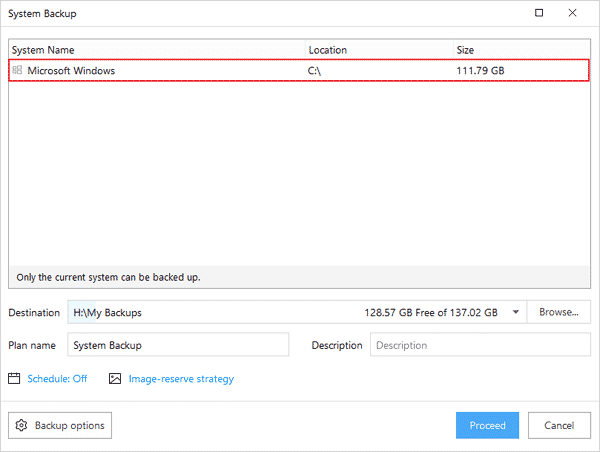
Step 3. Now, connect the USB Drive or CD/DVD Disk and then click on ‘System Backup’

Step 4. Now, select the system backup destination as the USB Drive or CD/DVD Disk and then click on ‘Proceed’
Step 5. Restart the PC and from the Windows Boot Menu, select ‘EaseUS Todo Backup’

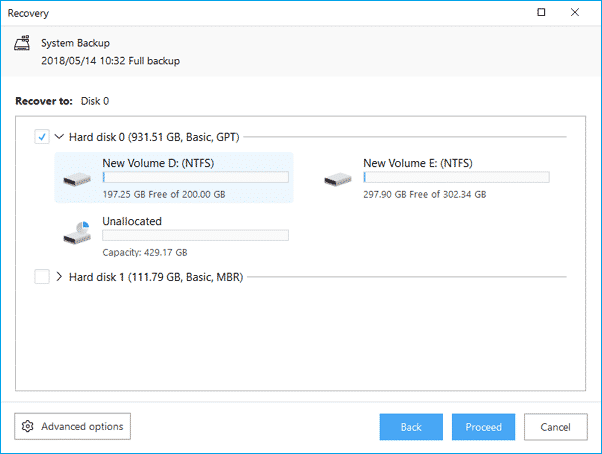
Step 6. Then you need to select the image file which you want to recover and then select the source you want to restore.
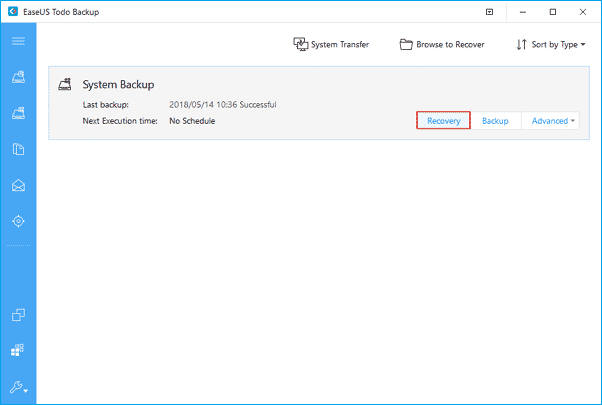
Step 7. In the final step, select the destination location where you want to recover the system and click on ‘Proceed’
That’s it, you are done! This is how you can create a Windows 10 Recovery Drive/Disk by using Todo Backup from EaseUS.
Conclusion
So, this is all about how to create a Windows recovery drive/disk. You can easily create a recovery drive for Windows 10 by following the methods given above. I hope this article helped you! Please share it with your friends also.
")

