
You can easily set a time limit for Windows 10 users. Check out the two best methods to set a time limit for Windows 10 users in 2020.
If you have been using Windows 10 computer, then you might know that the operating system provides users an option to create multiple user accounts. Not only that, but Windows also offers users a fast user switch feature as well. Let’s admit, sometimes we all want to set a time limit to selected Windows 10 user account.
By setting a time limit, you can restrict anyone including kids from overusing the computer. Apart from that, it will also ensure proper utilizing of the time and will make you more productive. So, in this article, we are going to share some of the best methods to set a time limit for logged-in Windows 10 users.
Also Read: How to Use an Animated GIF As Desktop Wallpaper in Windows 10
Steps to Easily Set A Time Limit For Windows 10 User
Below, we have shared two best methods to set a time limit for Windows 10 users. Please keep in mind that the second method will only work on selected Windows 10 build. So, we recommend you to follow the first one.
Step 1. First of all, press Windows Button and then type Cmd and then press enter. Or press Windows Key + X and then select command prompt
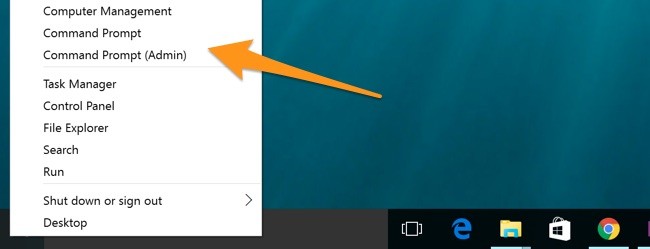
Step 2. Now the command prompt will appear, and you need to type the below command there
net user username /times:M-F,10:00-22:00;Sa-Su,09:00-23:00
Let’s Know how each part of the command works:
- You need to replace <username> with the name of your account, or the account you want to limit
- You need to replace <day> with the day you want to set time limits on. The initials of days are Su, M, T, W, Th, F, Sa.
- You need to replace <time> with the range using either a 13 hour or 24-hour format. You can’t add minutes to the time.
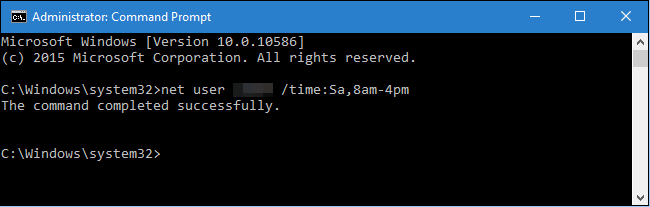
For example, we have set “net user hello /time:Sa,8am-4pm“
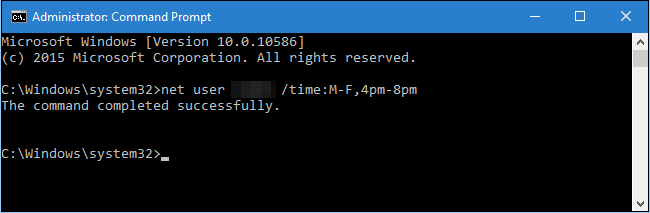
Step 3. You can even set the range of days with the same time limits. You just need to separate the days with the hyphen. For example, we have set the same time limit for Monday to Friday.
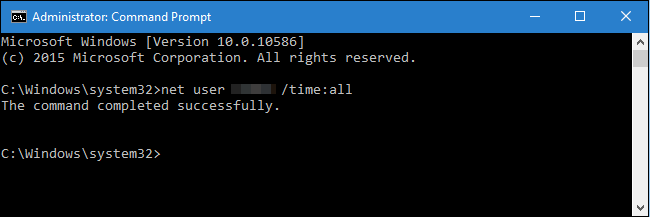
Step 4. If you want to remove the restriction, then you need to enter the below command in command prompt.
net user username /times:all
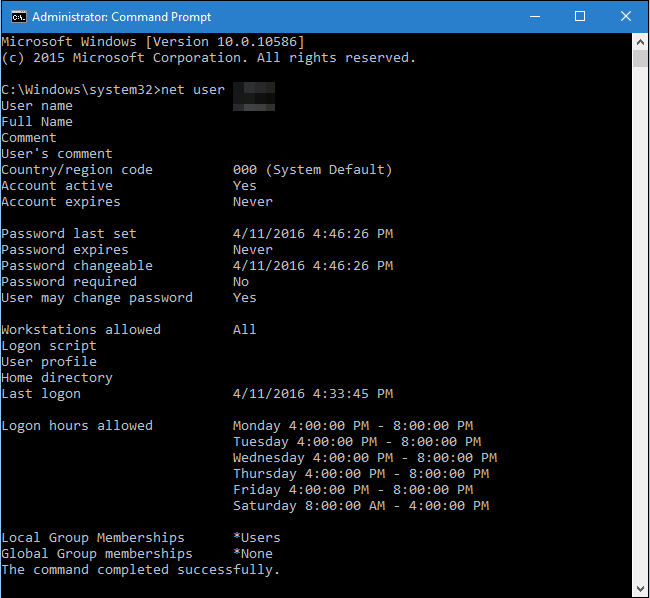
Step 5. If you want to see what times you have set simply type in this code in CMD
net user hello
Note: Make sure to replace ‘Hello’ with the username of the account
That’s it you are done, now you can easily set up a time limit by entering this command.
2. Create a child account
You can also create a child account on Windows 10 to restrict the logged-in time. The reason why we have selected Child Account is that it provides you lots of parental control features. One of those features can be used to set a time limit for a user account.
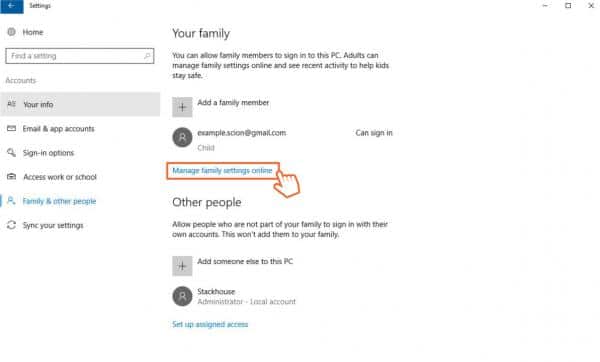
Step 1. First of all, open Settings on Windows 10 computer and then click on ‘Family & Other People’

Step 2. There just follow the on-screen instructions to create a new child account.
Step 3. Once done, head to the Settings > Family & Other People. There click on Manage Family Settings Online.
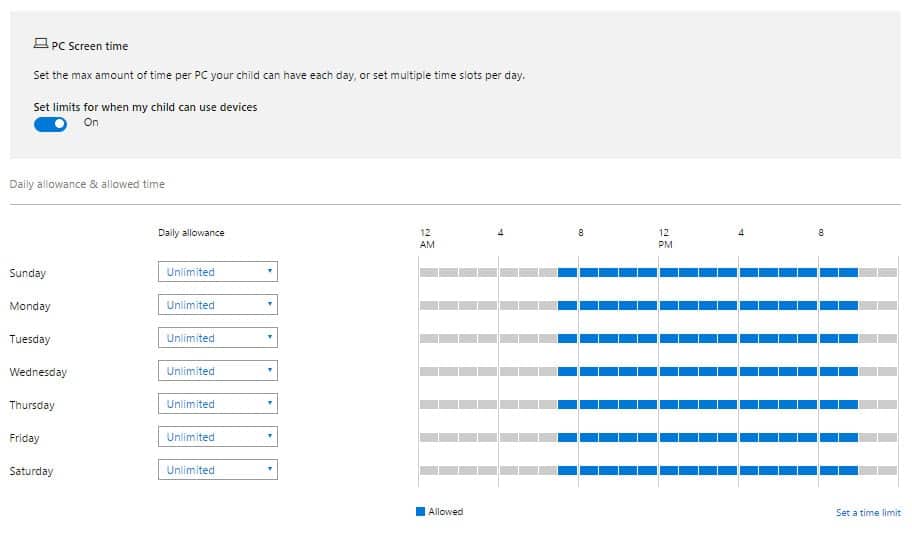
Step 4. There scroll down and select ‘PC Screen Time‘. From there, you can set time limits from zero to twelve hours in half-hour increments. What’s interesting is that you can set the daily screen allowance on a daily basis as well.
That’s it, you are done! This is how you can set parental controls for Windows 10 computers.
So this is all about Set a Time Limit for Windows 10 Easily. I hope this article helped you! Share it with your friends also.


