
Let’s just admit, we all have dealt with situations where we have just wanted to put our Android smartphone into a silent mode. For example, if you are carrying your smartphone to school, or business interview, or coaching classes, you always want your smartphone to be as silent as possible.
Well, few Android devices do have a Do Not Disturb Mode that allows users to control the ringtone and notification sounds, however, not all Android devices have the DND Mode. Actually, you don’t really need a Do Not Disturb mode to control Android’s volume level.
Set Your Android’s Volume Level to Change on a Schedule
There are lots of Android apps available on the Google Play Store that allows users to set their Android’s volume level to change on a schedule.
So, in this article, we are going to share the two best methods that can be used to adjust your Android’s volume level as per your wish.
1. Using Volume Scheduler
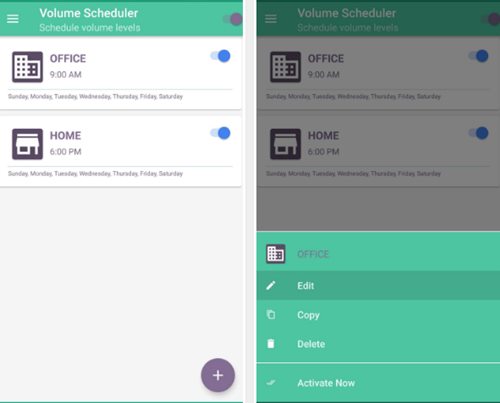
Volume Scheduler is one of the best free volume scheduler app available on the Google Play Store. The great thing about Volume Scheduler is that it can automatically change the ringtone volume of your phone from low to high and high to low based on the schedule you provide.
Step 1. To get this one going, start by installing Dama’s free app, which is called Volume Scheduler. Install the Volume Scheduler app from the Google Play Store.
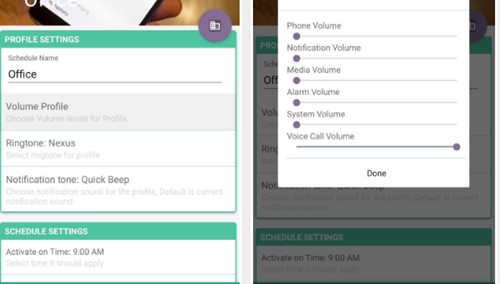
Step 2. Now enable the toggle button for Volume Scheduler on the top. You’ll see two preset volume profiles named Office and Home. You could tap on the (+) button at the bottom of the screen to create a new profile. You can also alter the existing profiles just tap one of the presets, then select “Edit” from the menu to make it your own.
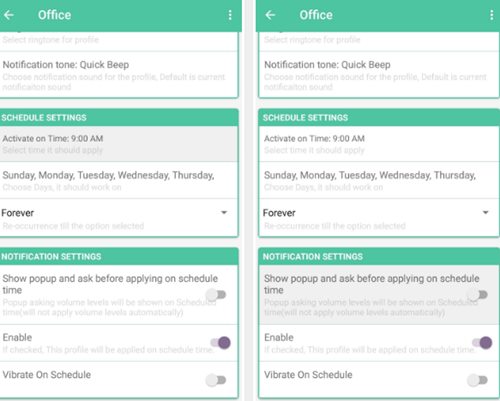
Step 3. Next, you need to adjust the schedule settings. You need to adjust the time, date, repeat dates, etc.
Step 5. When everything is done, move to the main menu. You will now see the profiles with the changes that you have made.
That’s it, you are done! This is how you can use the Volume Scheduler app to set your Android’s volume level to change on a schedule.
2. Using Sound Profile
Sound Profile is one of the best Android app available on the Google Play Store that allows users to set the Android’s Volume level to change as per the schedule. Here’s how to use the app.
Step 1. First of all, download & install Sound Profile on your Android smartphone.
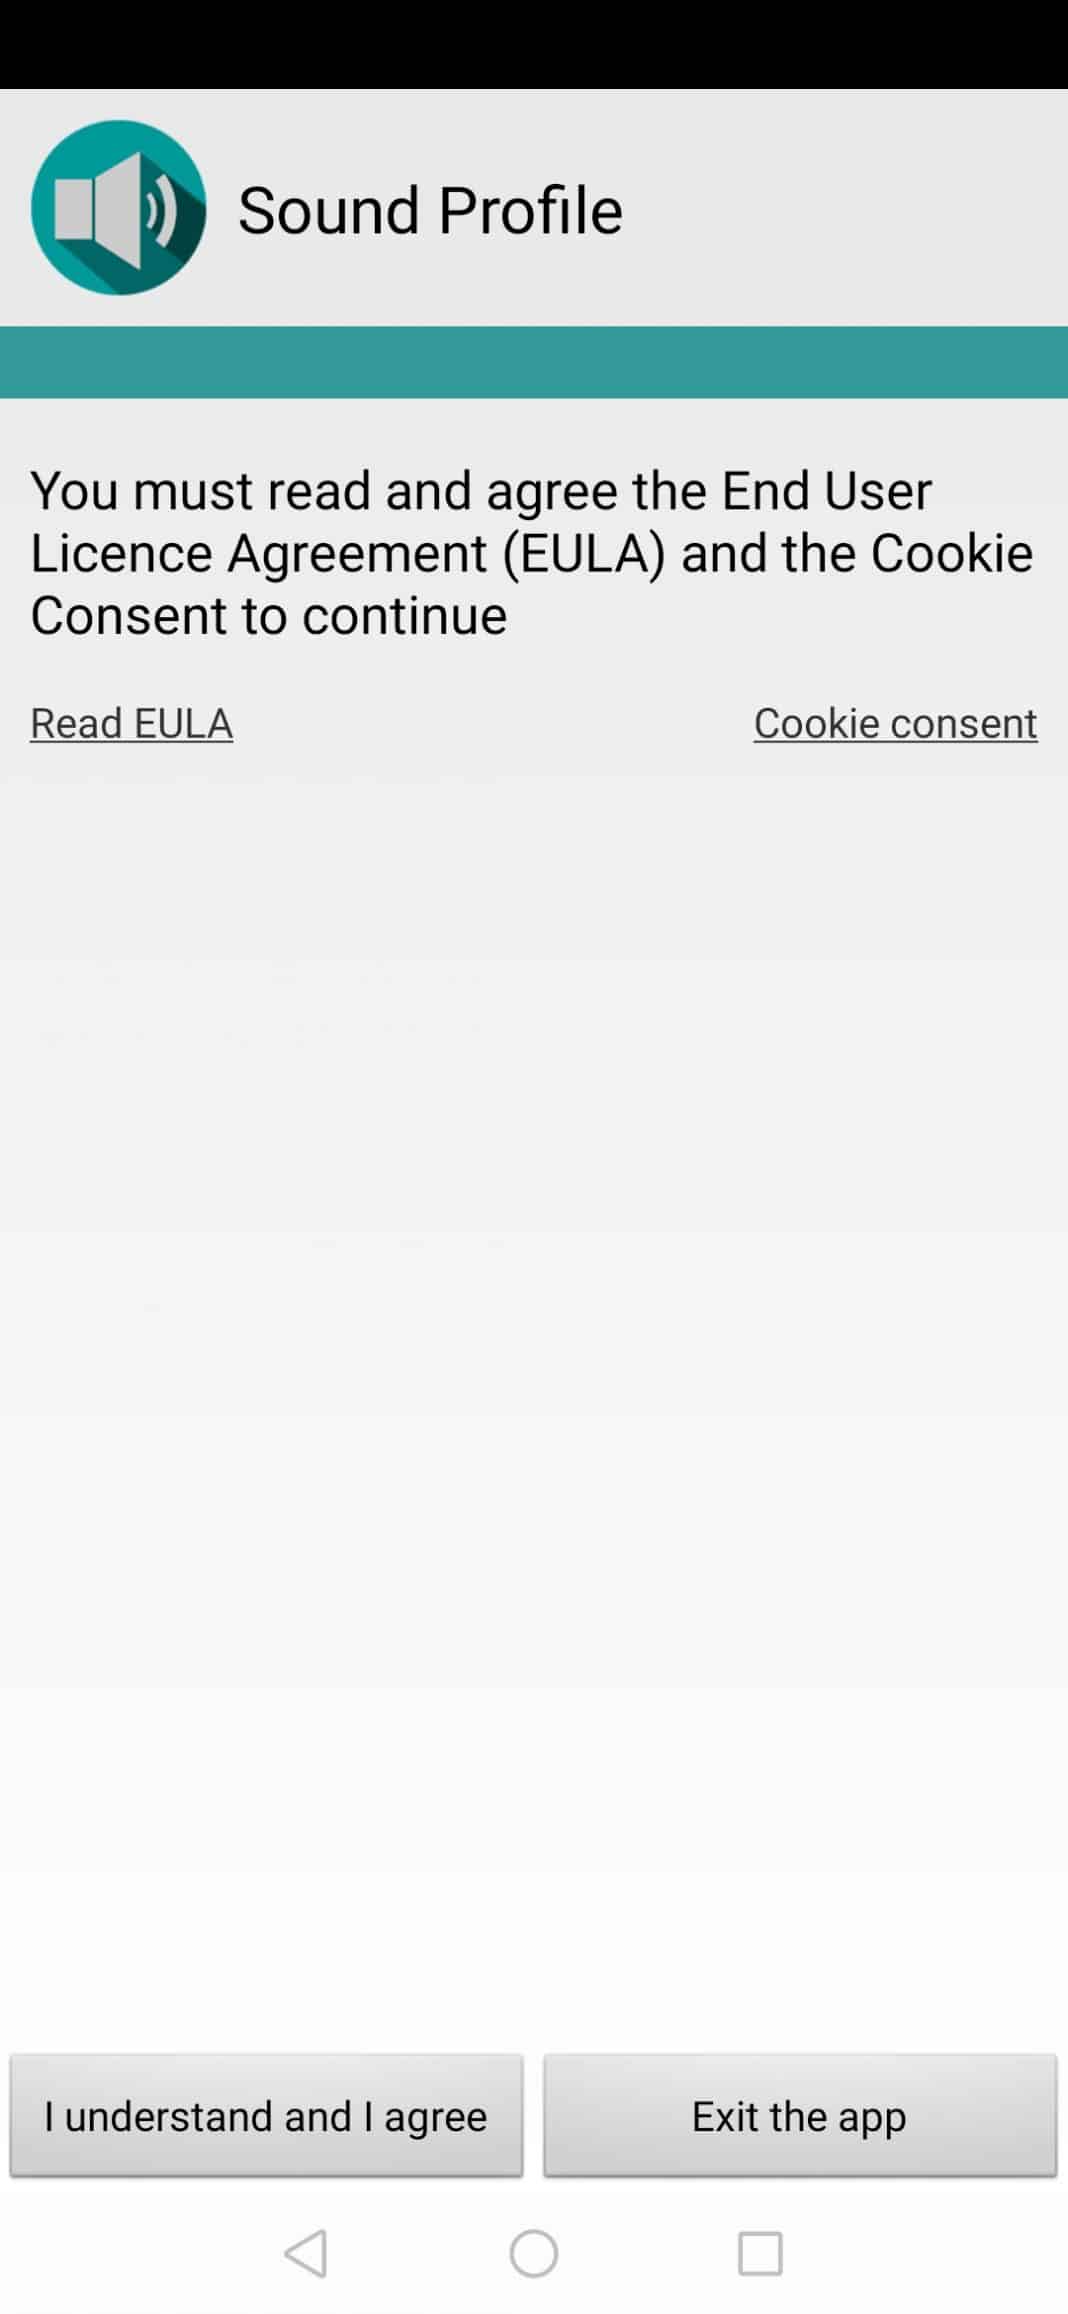
Step 2. Once done, open the app. You will see a screen like below, where you need to tap on the ‘I understand and I agree’ button.
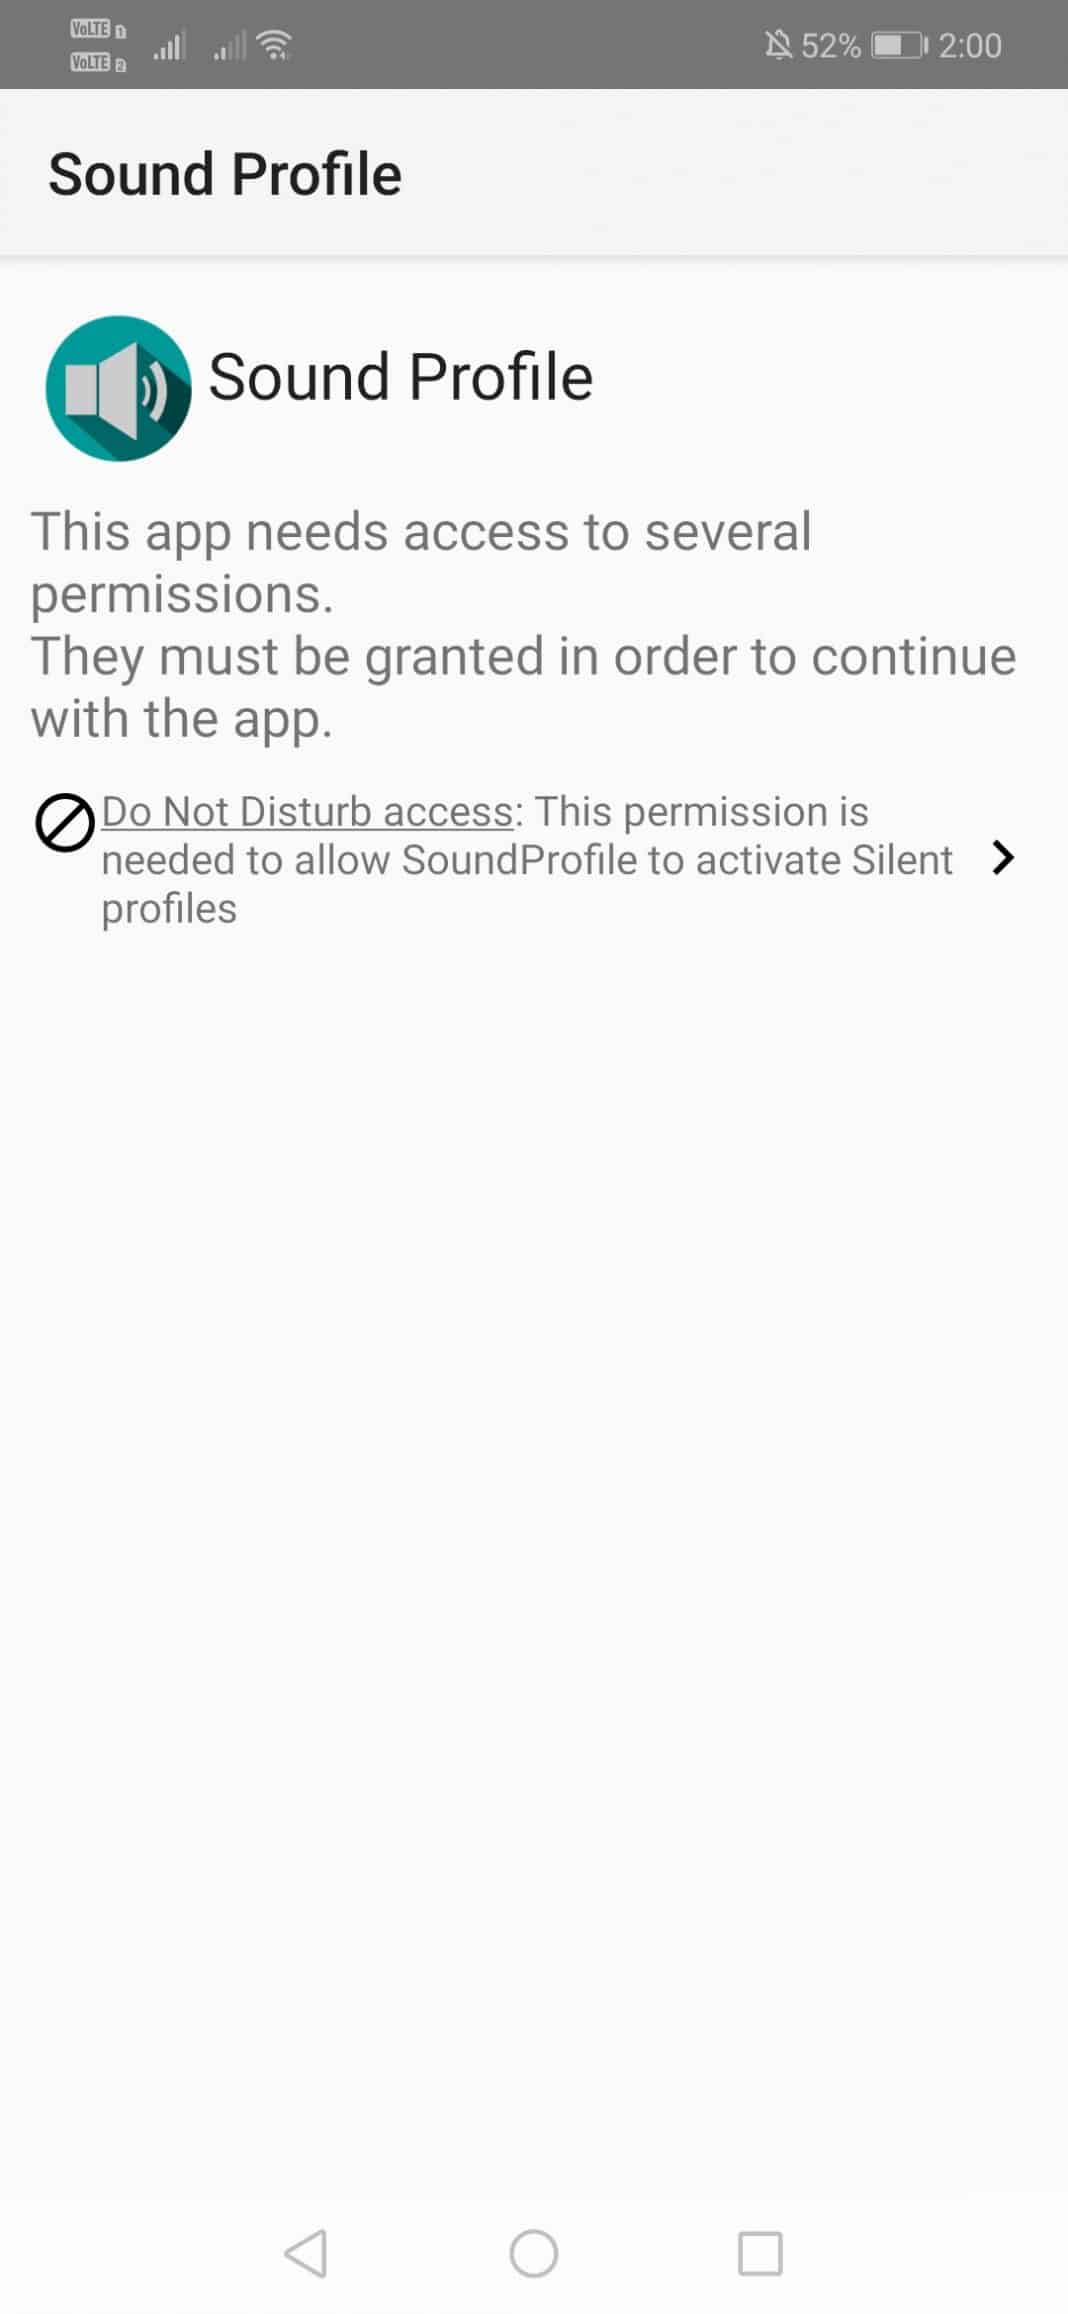
Step 3. In the next step, you will be asked to grant two permissions. Grant the permissions.
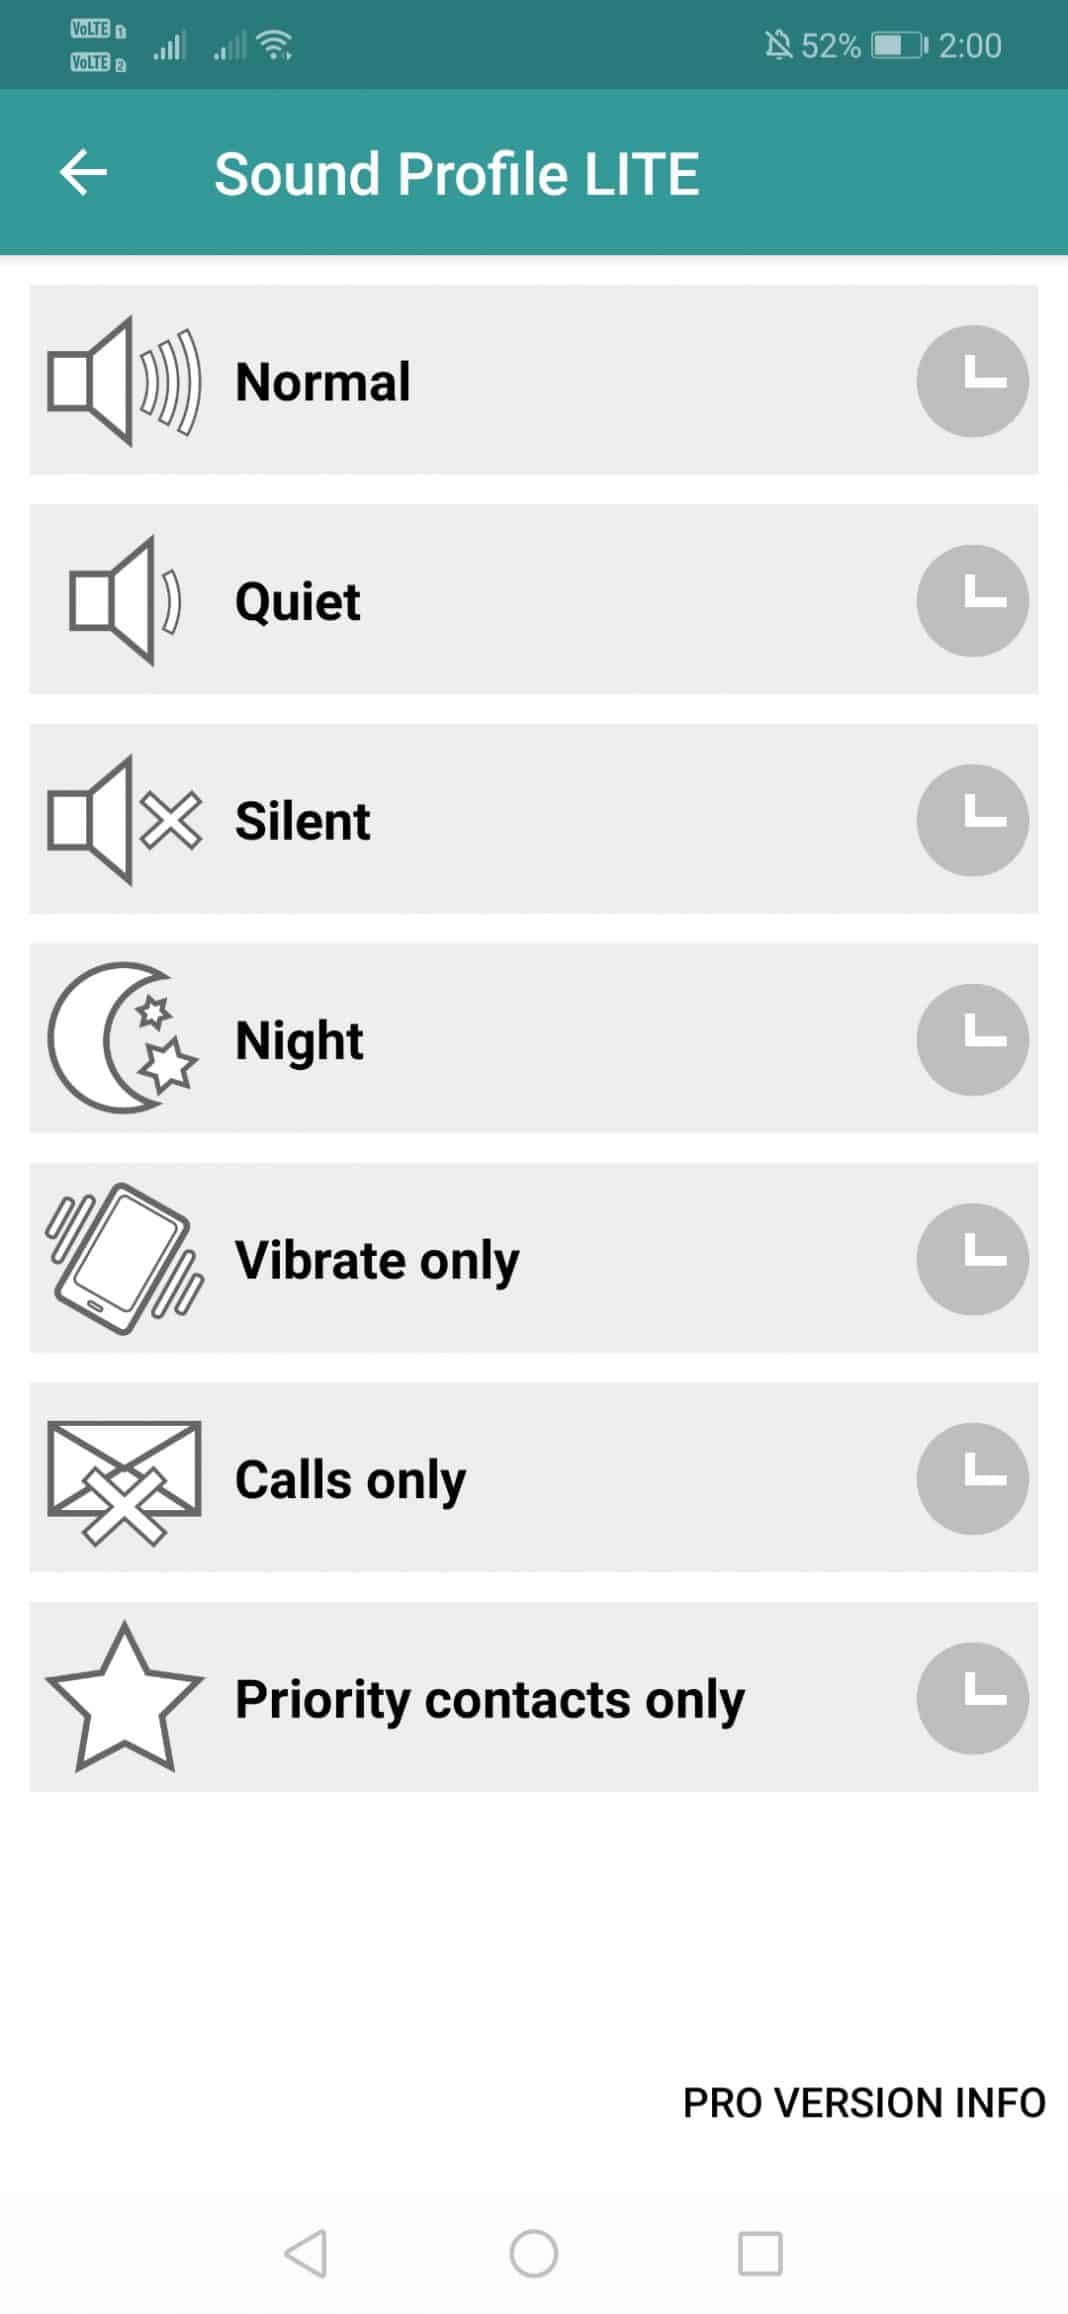
Step 4. Now you will see the main interface of the app.
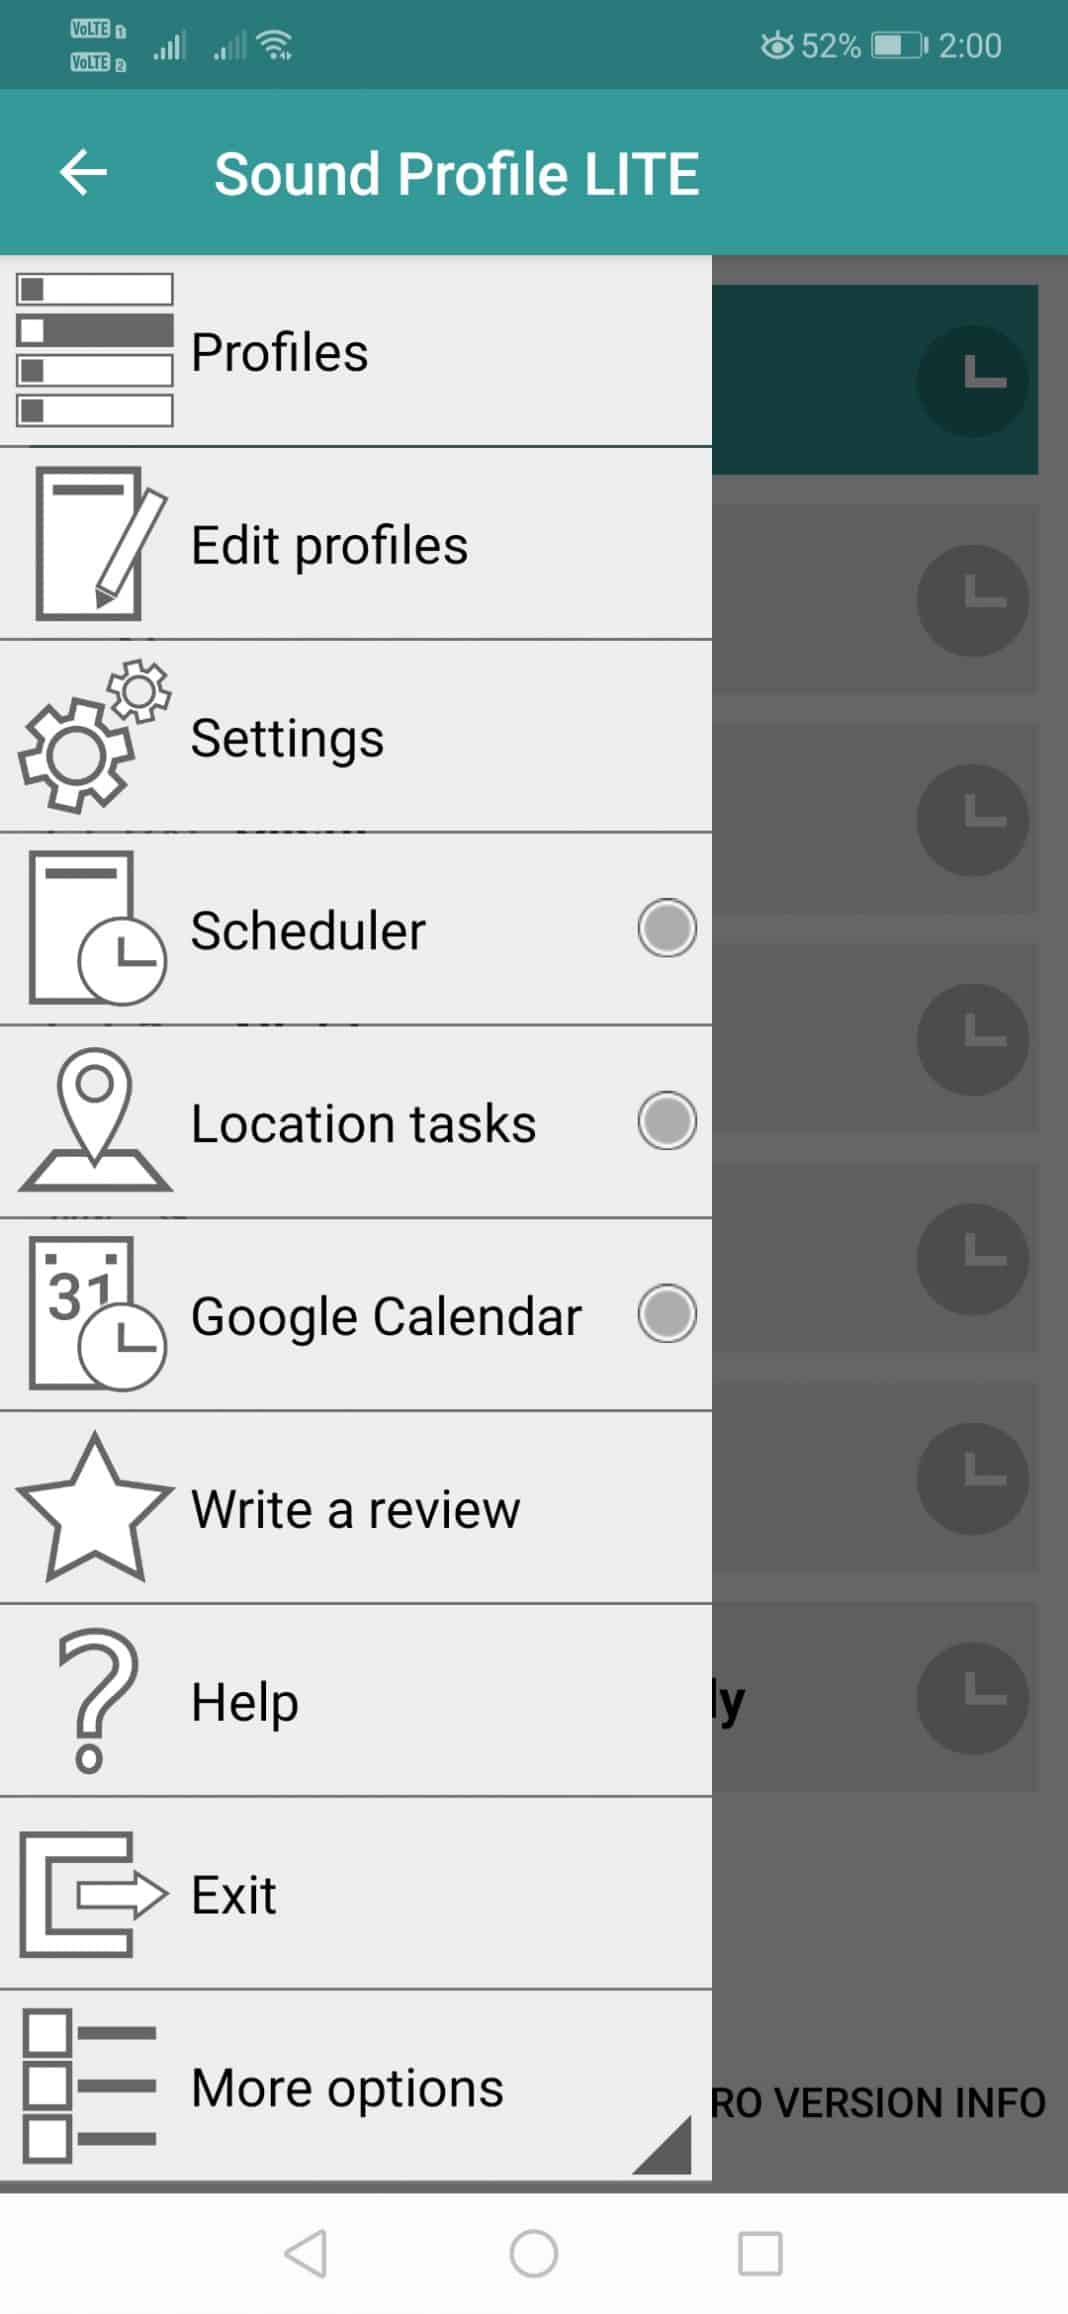
Step 5. Now swipe your screen from left to right to open the Sound Profile options. There you need to tap on ‘Edit Profiles’
Step 6. There you need to set everything as per your requirements. For instance, you can set up a name, volumes, etc.
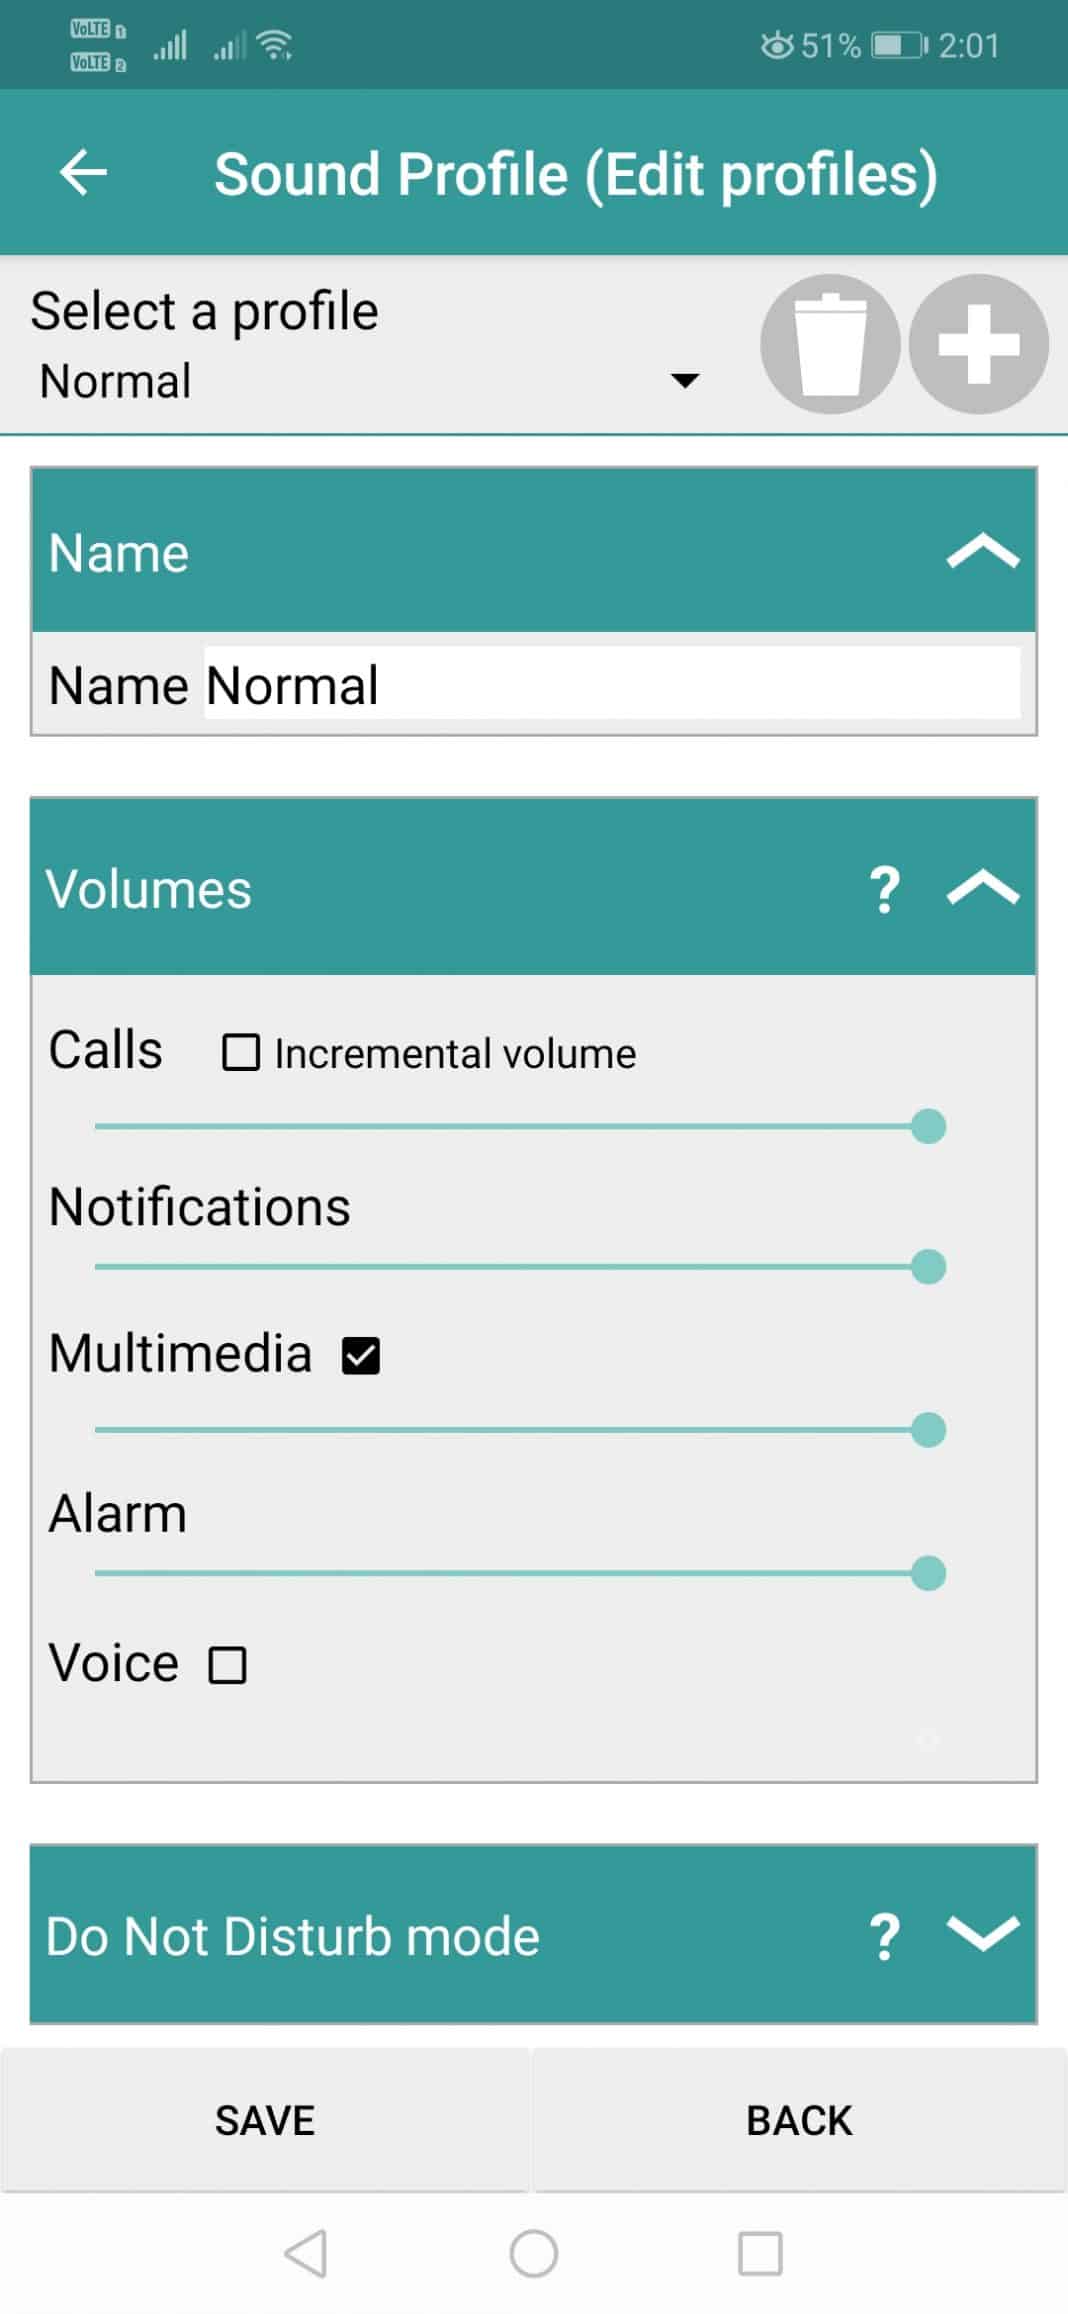
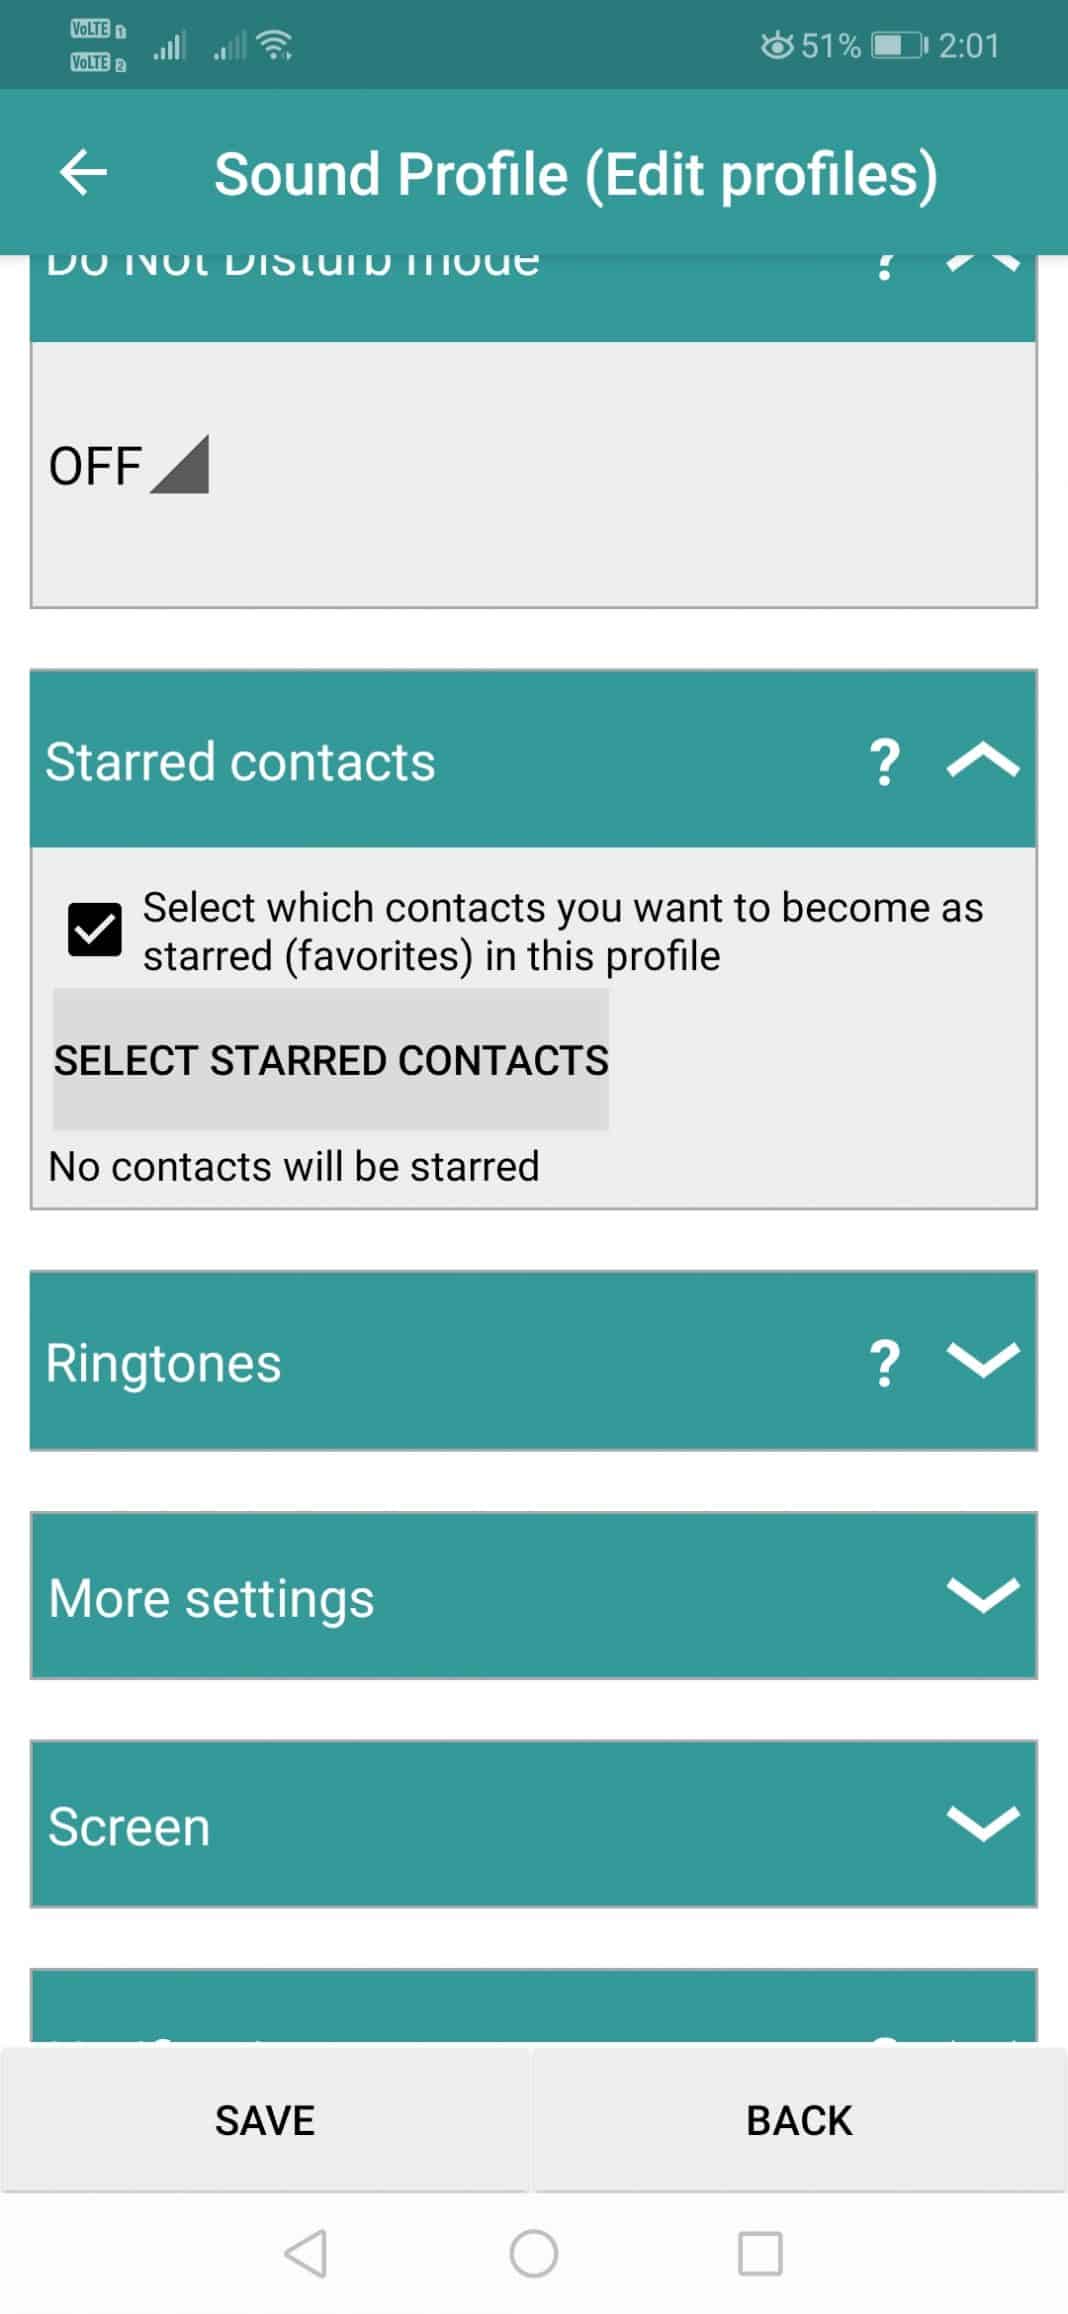
Step 7. You can also set up the Do not disturb mode for the sound profile.

Step 8. If you want to whitelist any particular contact, add it to the ‘Starred contacts’ list.
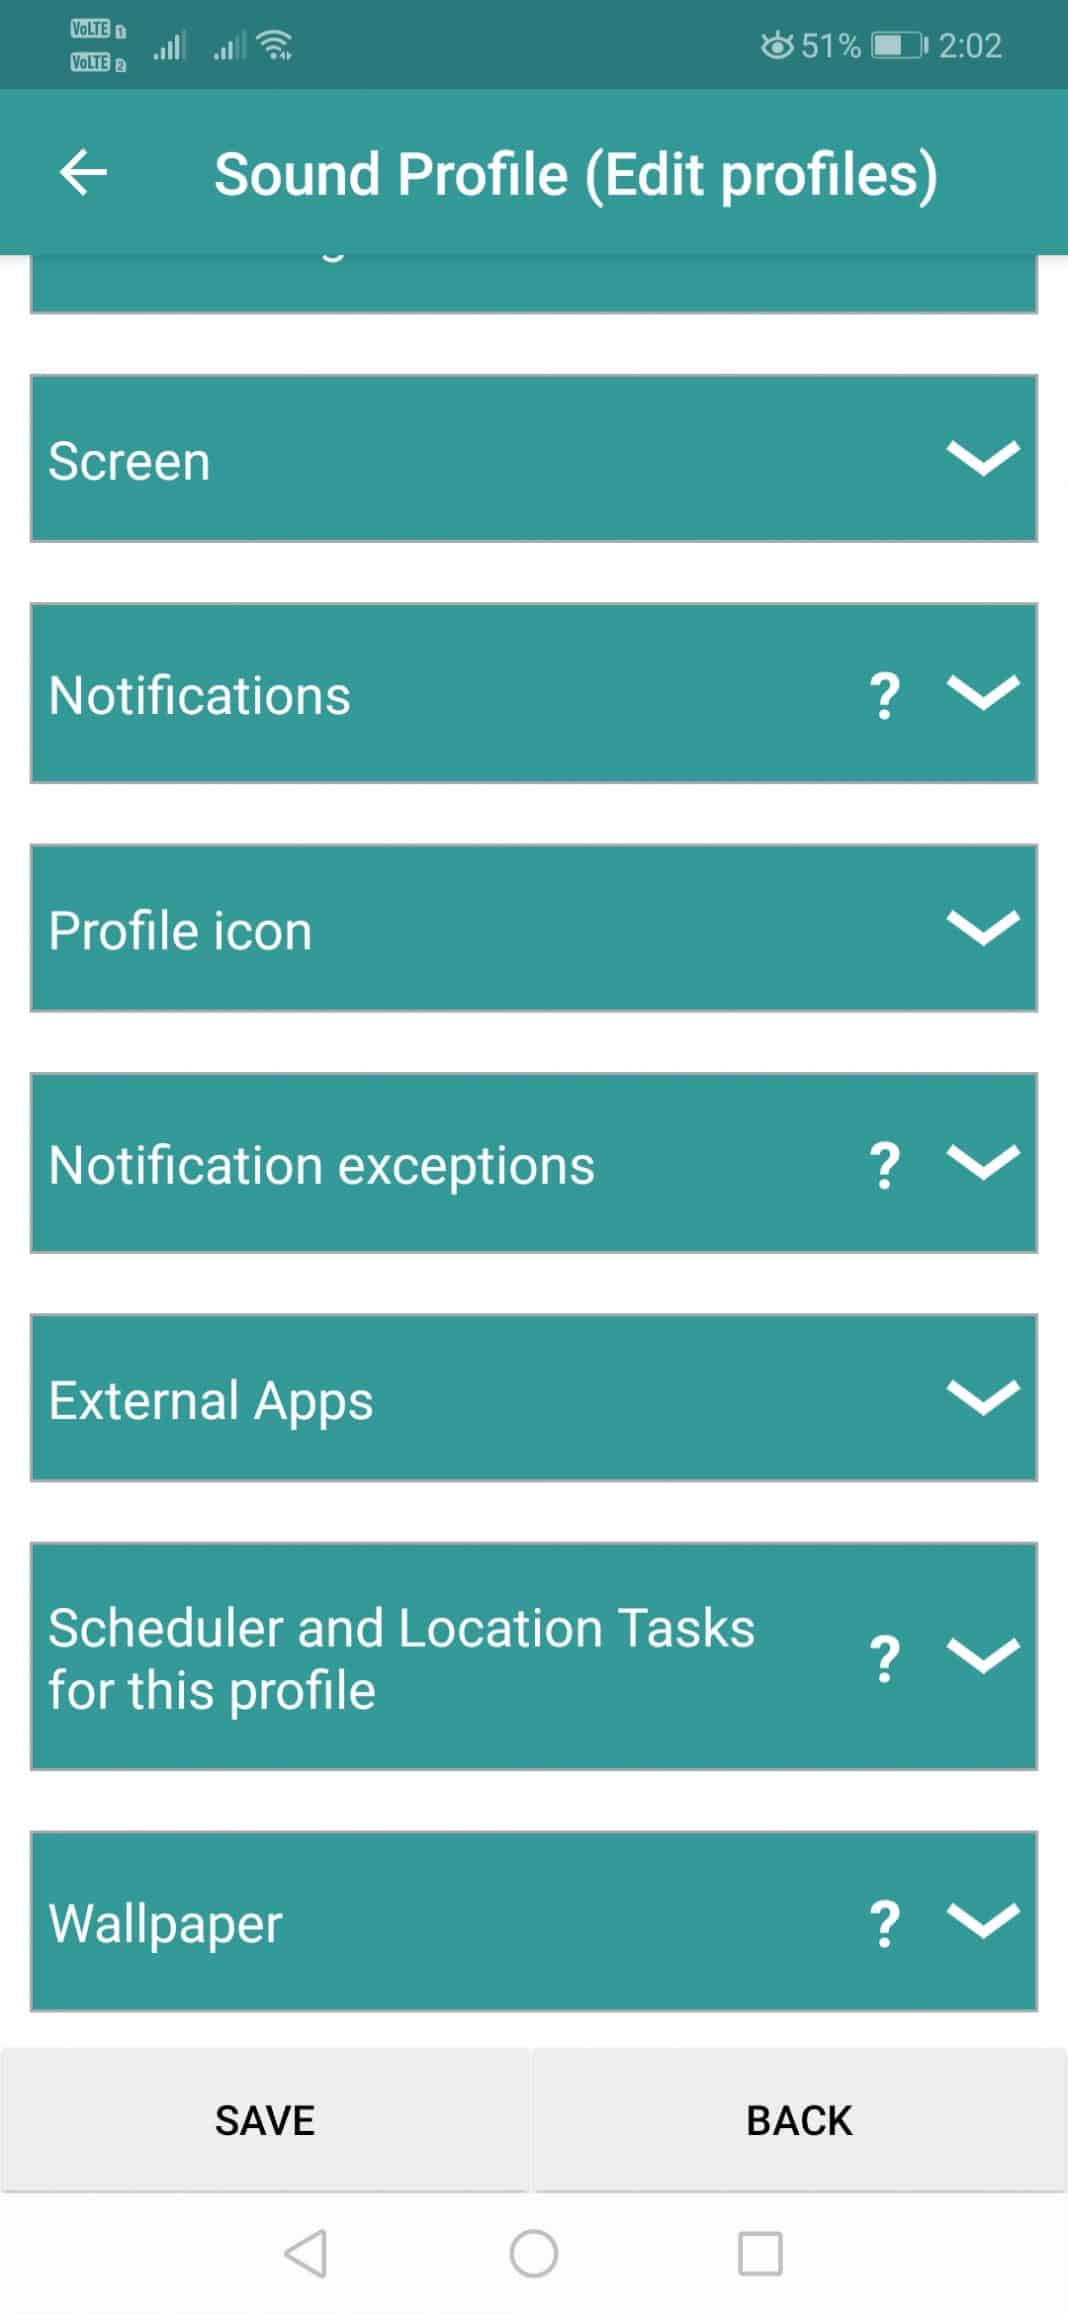
Step 9. You can also explore the ‘More Settings’ option to control other factors like Vibration, Bluetooth, WiFi, etc.
So, this is how you can use Sound Profile to Set your Android’s Volume Level to change on a schedule.
So, this is how you can set Android’s volume level to change on a schedule. I hope this article helped you! Please share it with your friends also. If you have any doubts related to this, let us know in the comment box below.


